Overview
This article provides instructions to set up a cPanel email account on an Android device.
Important Notes:
- In all the steps below, it is assumed that your domain is pointing to our name servers, and that its DNS fully resolves from our servers. If you have recently updated the name servers for your domain, or have recently purchased a hosting from us, it may take a while for DNS (and SSL) to be activated, and this due to DNS propagation (which may take up to 48 hours, it's how the internet works, so you may need to be a little patient)
- If you will not being hosting your domain's DNS using our name servers (i.e: your domain is on Cloudflare, etc), then you will be replacing mail.example.com in the illustrations below, with the hostname of the server on which your account is hosted (hostname can be obtained from the Service Details page on the Dashboard).
Note:
The email account should be already created and setup in cPanel interface. For instructions on how to create an email account on cPanel, visit this link.
You can find your email account’s settings (for example, username, incoming server, and outgoing server) in the following locations:
- cPanel’s Setup Mail Client interface (cPanel >> Home >> Email >> Email Accounts).
- The Webmail interface.
- The welcome email that your administrator sent you.
Setting up your email account on Android device:
This guide was created using Android version 10 on a Google Pixel 3
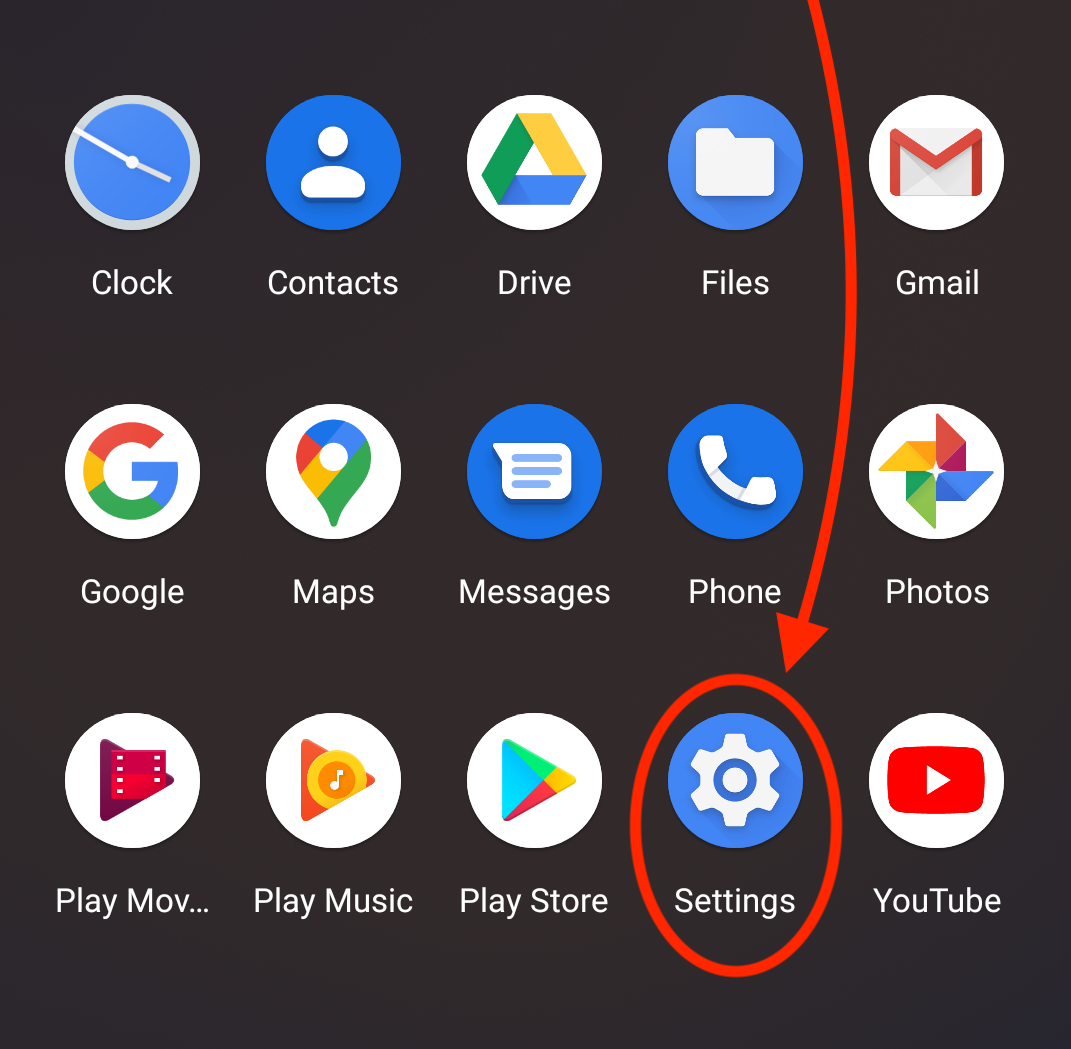
1. On your Android device, open the Settings menu.
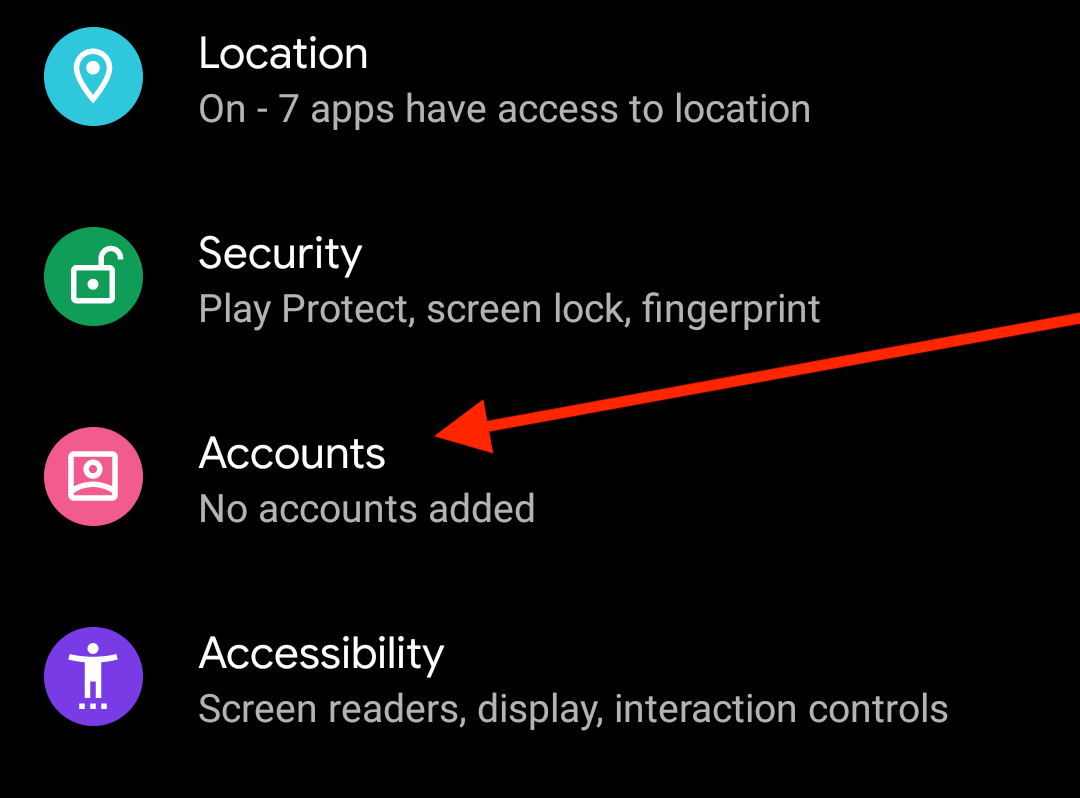
2. In the Settings menu, tap on Accounts. The Accounts interface will appear.
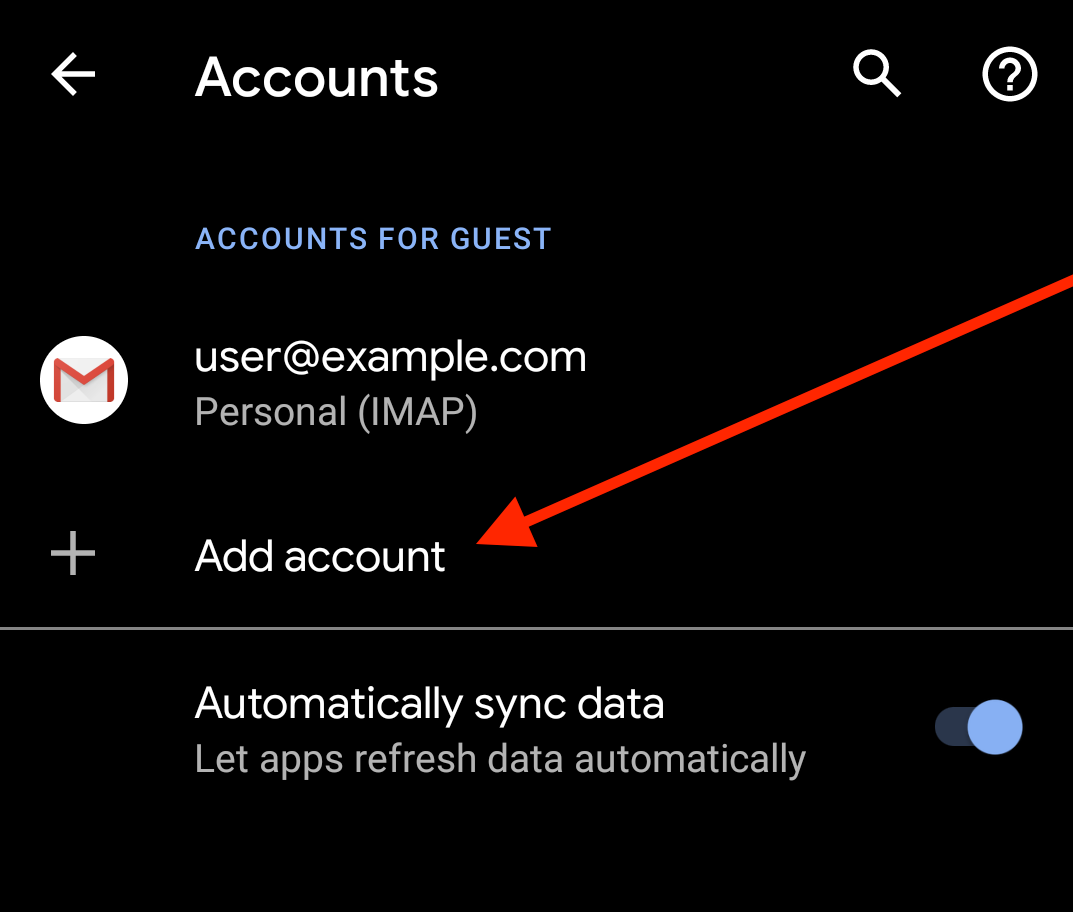
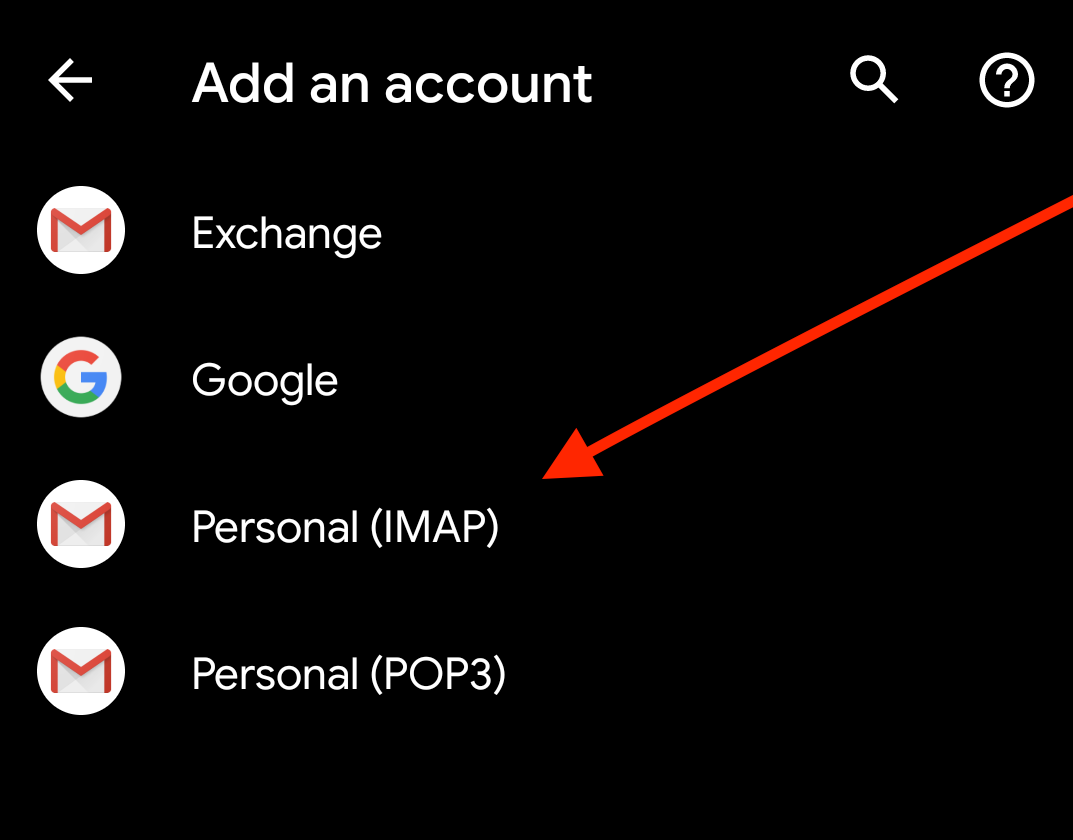
3. Tap on Add Account. The Add an account interface on step 4 will appear.
4. In the Add an account interface, tap Personal (IMAP).
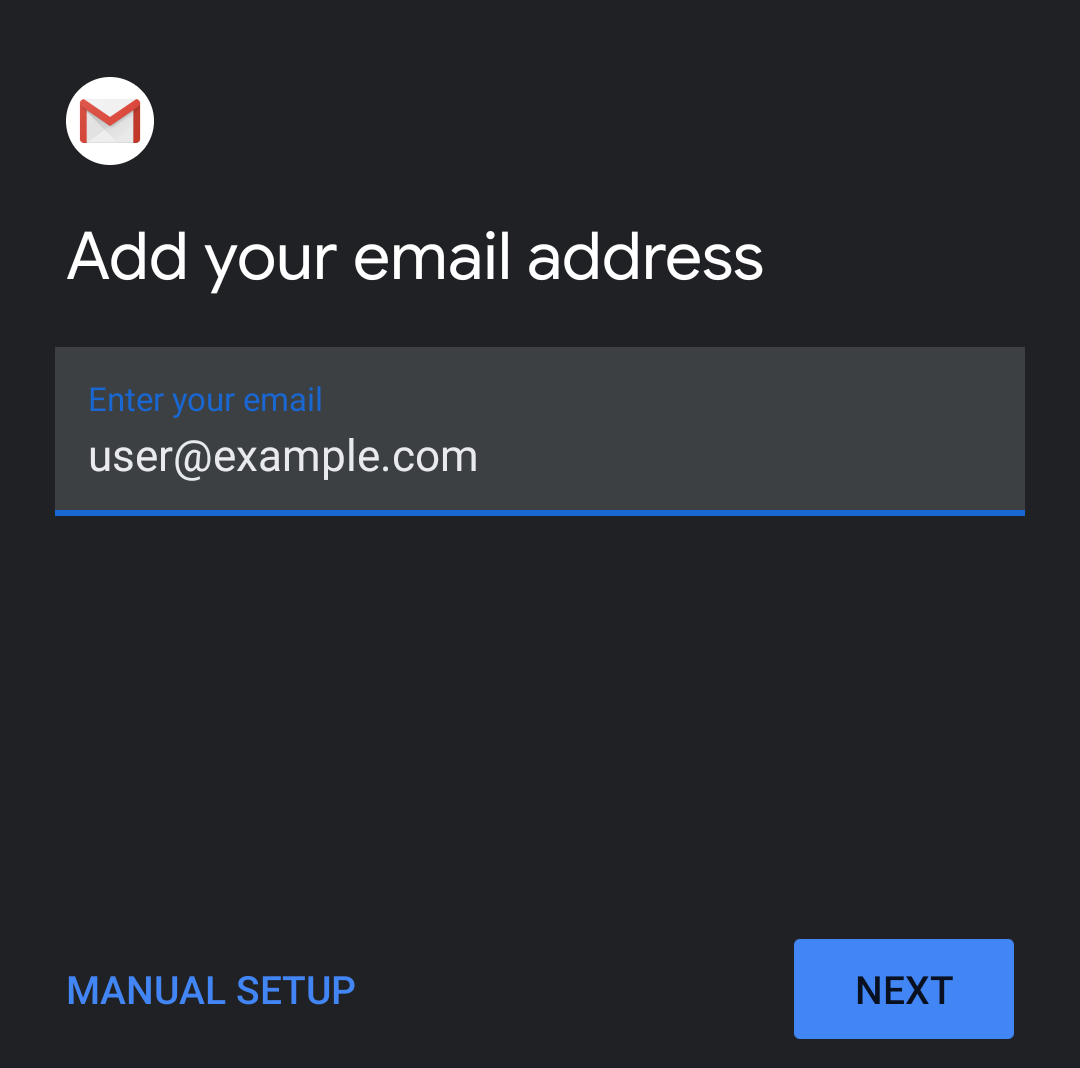
5. In the Enter your email text box, enter your full email address. Tap Next.
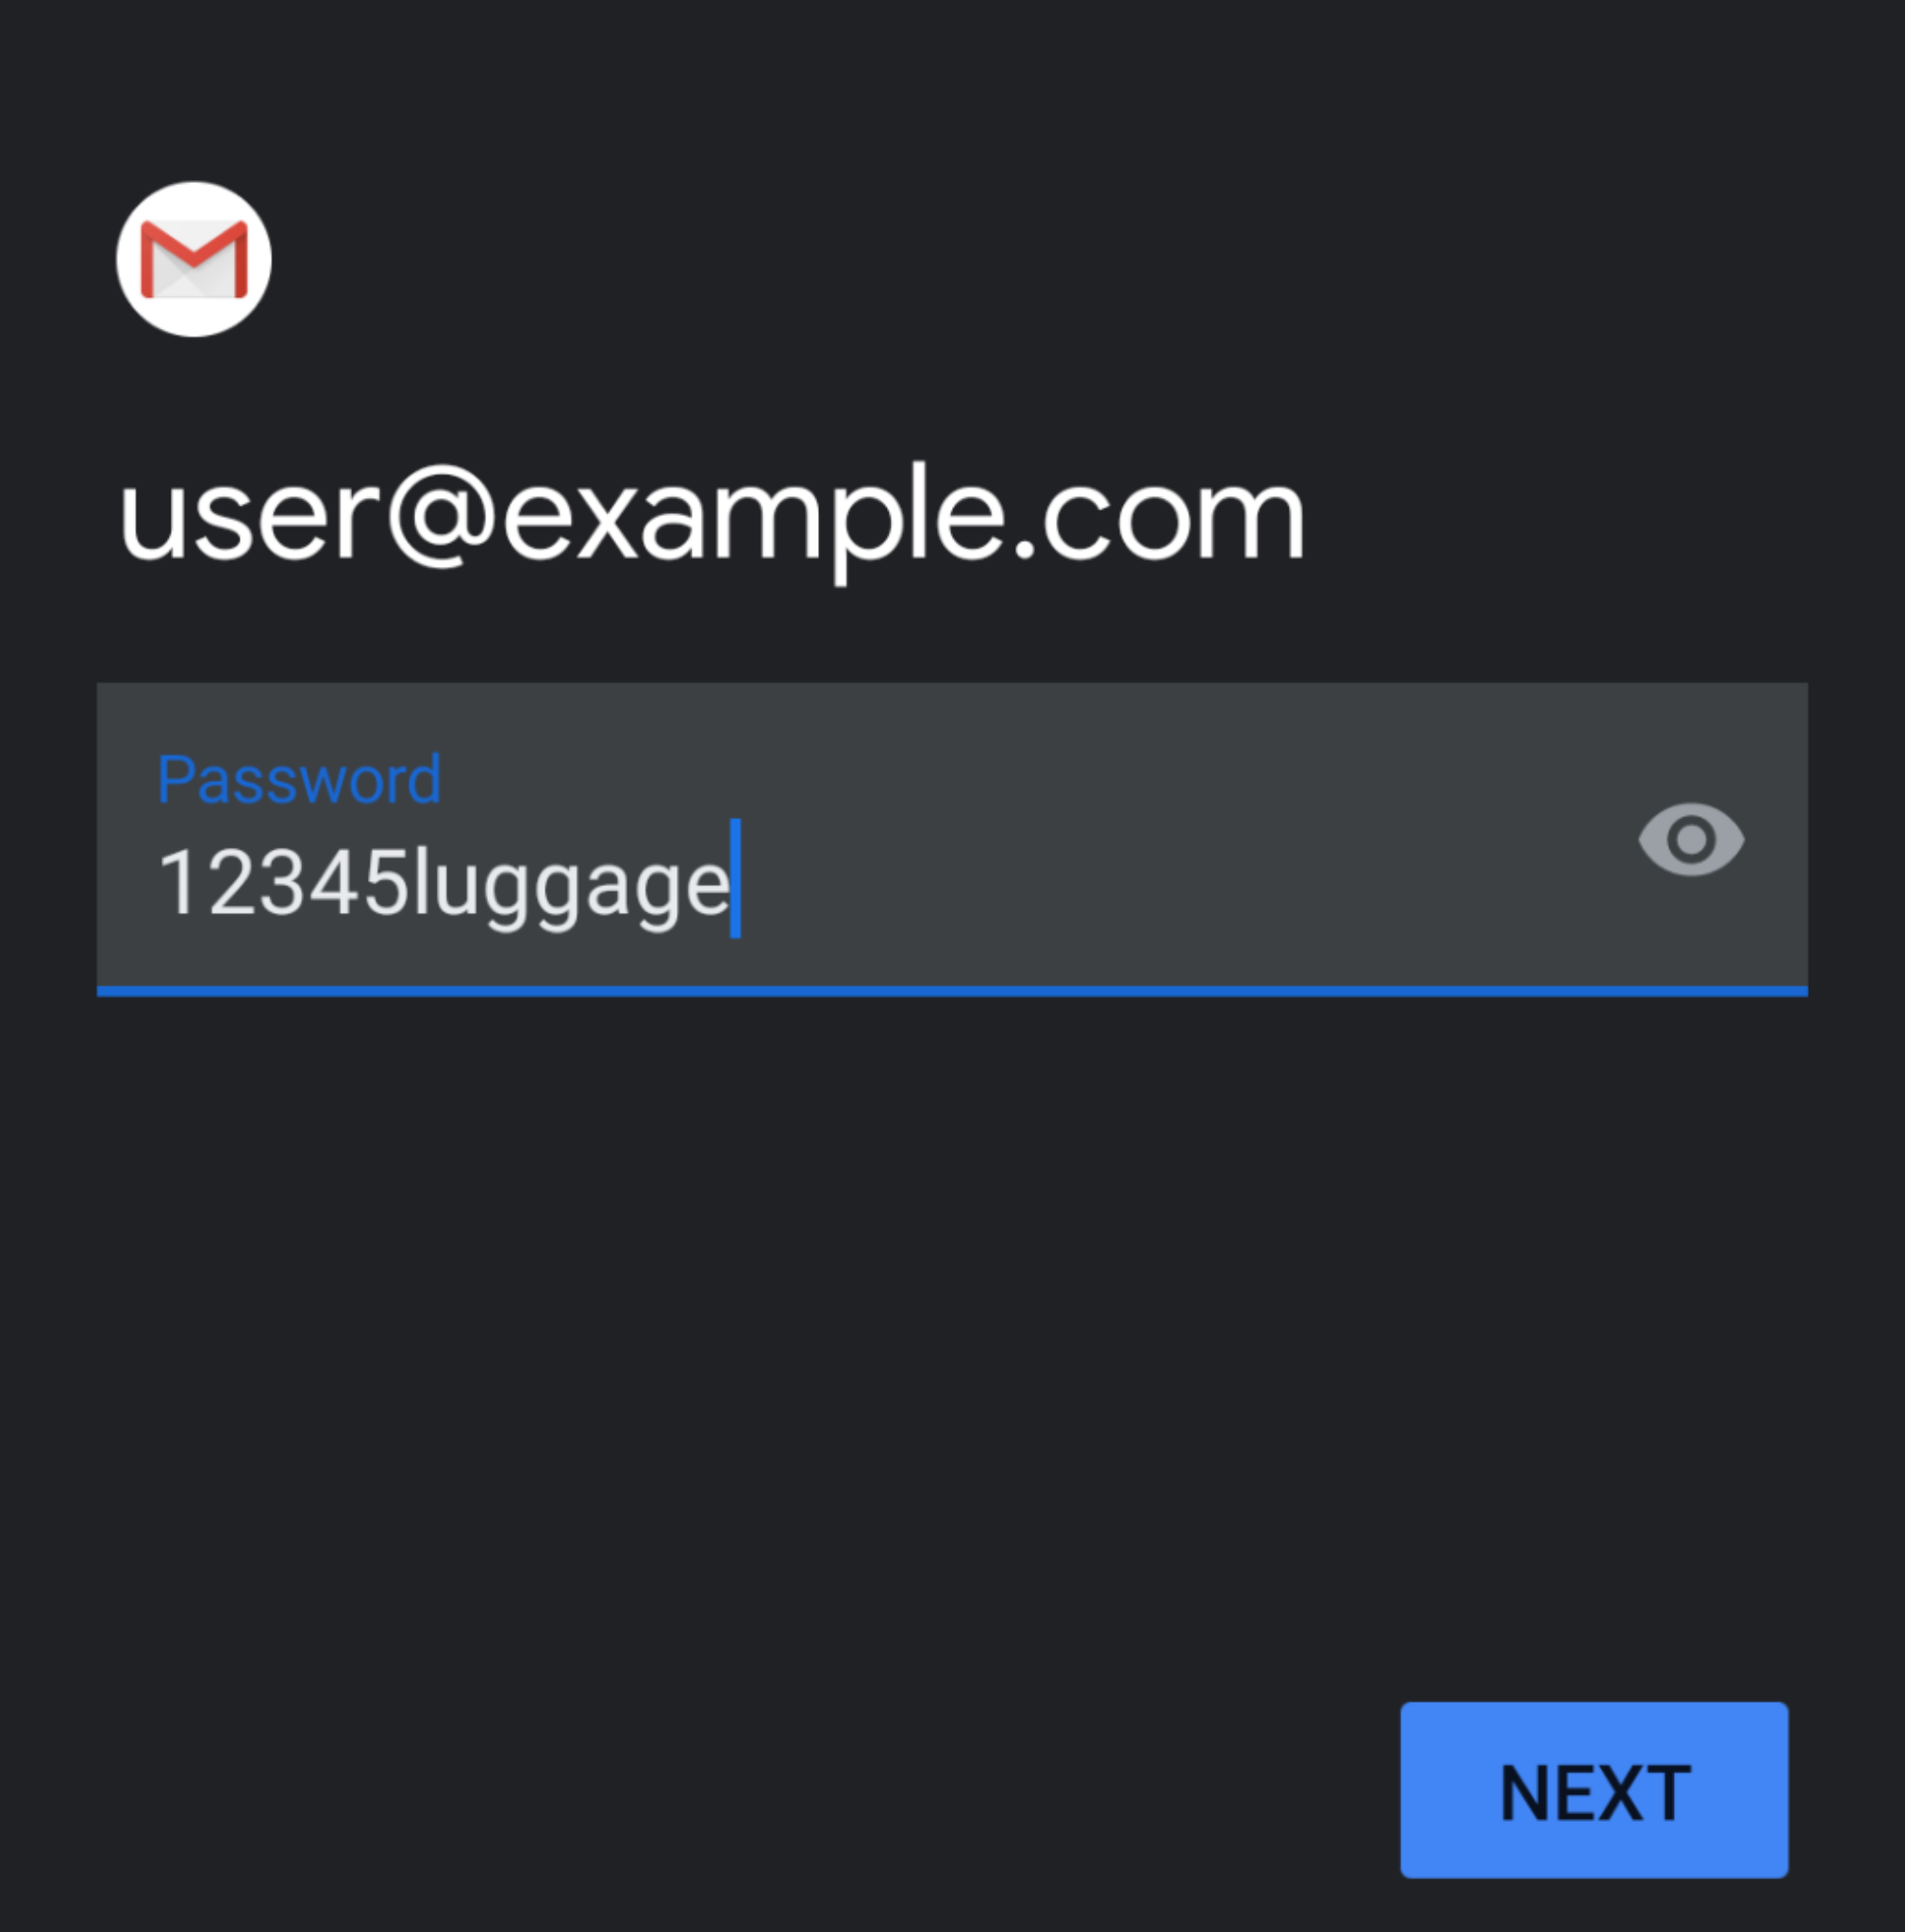
6. Enter your password in the Password textbox. Tap Next. This will open the Incoming server settings Interface on step 7 below.
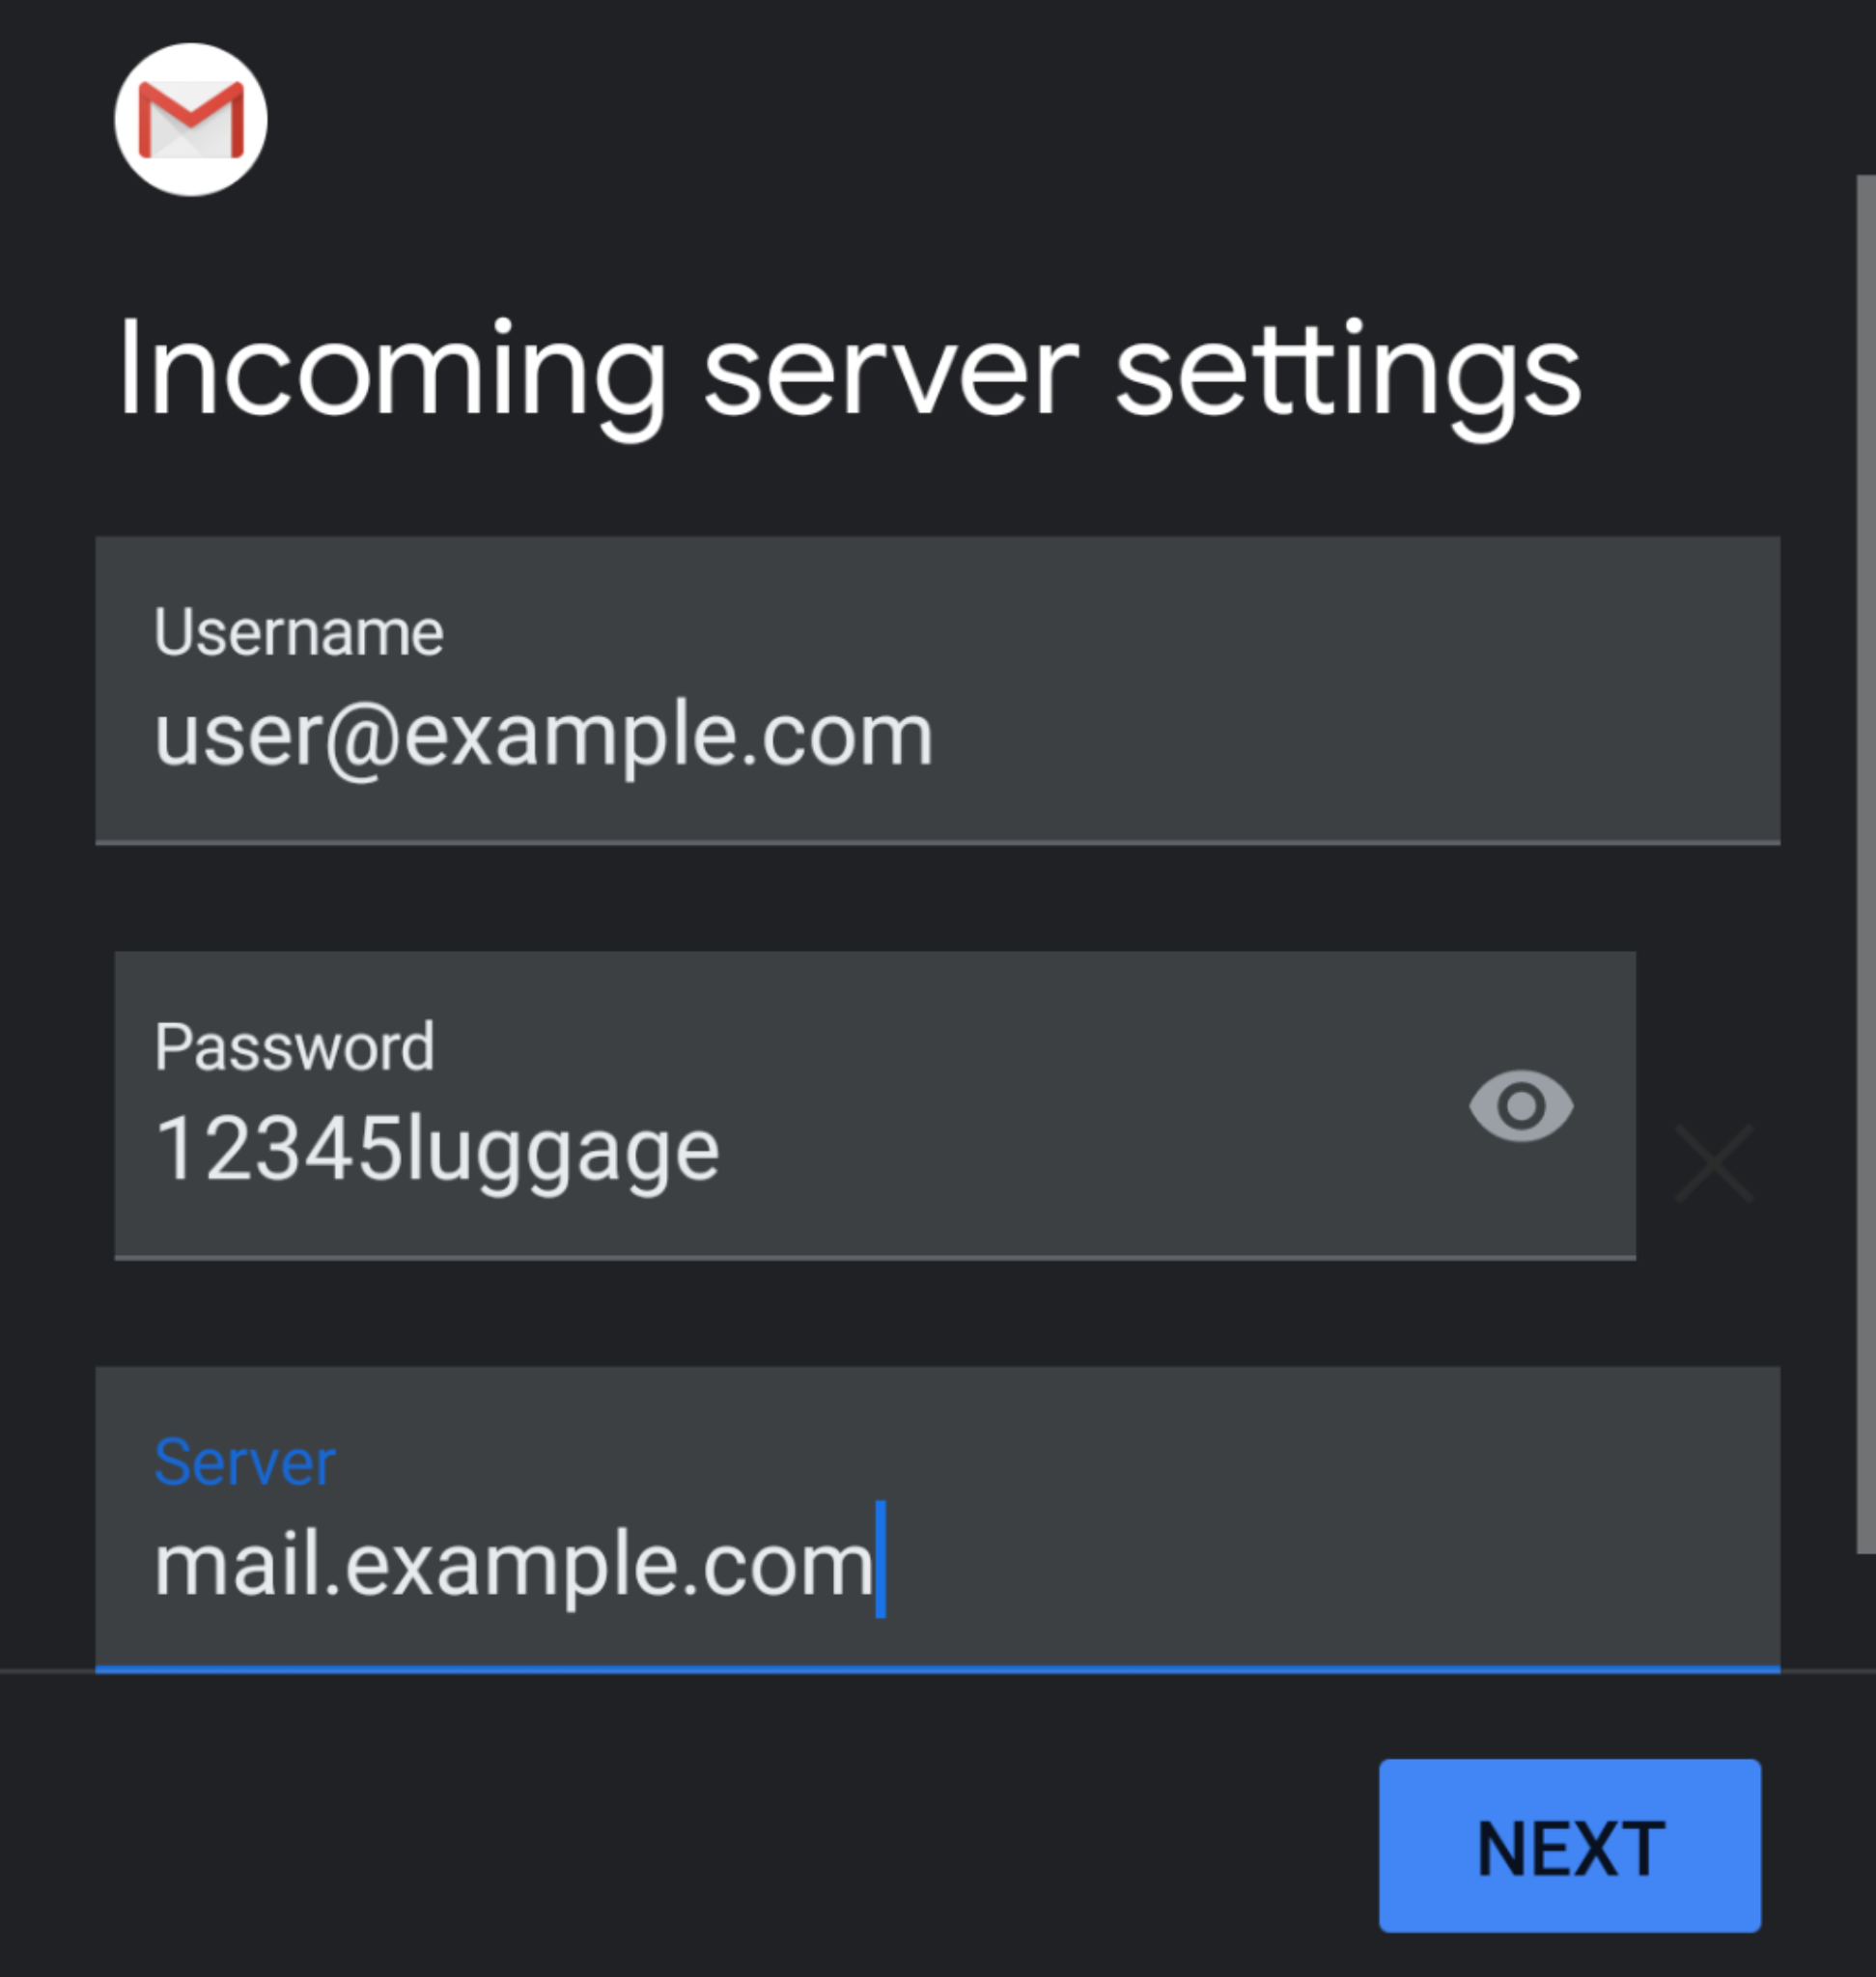
7. Your Username and Password will be automatically filled with your previously entered information.
7.1 In the Server textbox, enter the information as below (replace example.com with your domain):
7.2 Tap Next and The Outgoing server settings interface in step 8 below will appear.
8. Your Username and Password will be automatically filled in with your previously entered information.
8.1. In the Server textbox, enter the information as below (replace example.com with your domain):
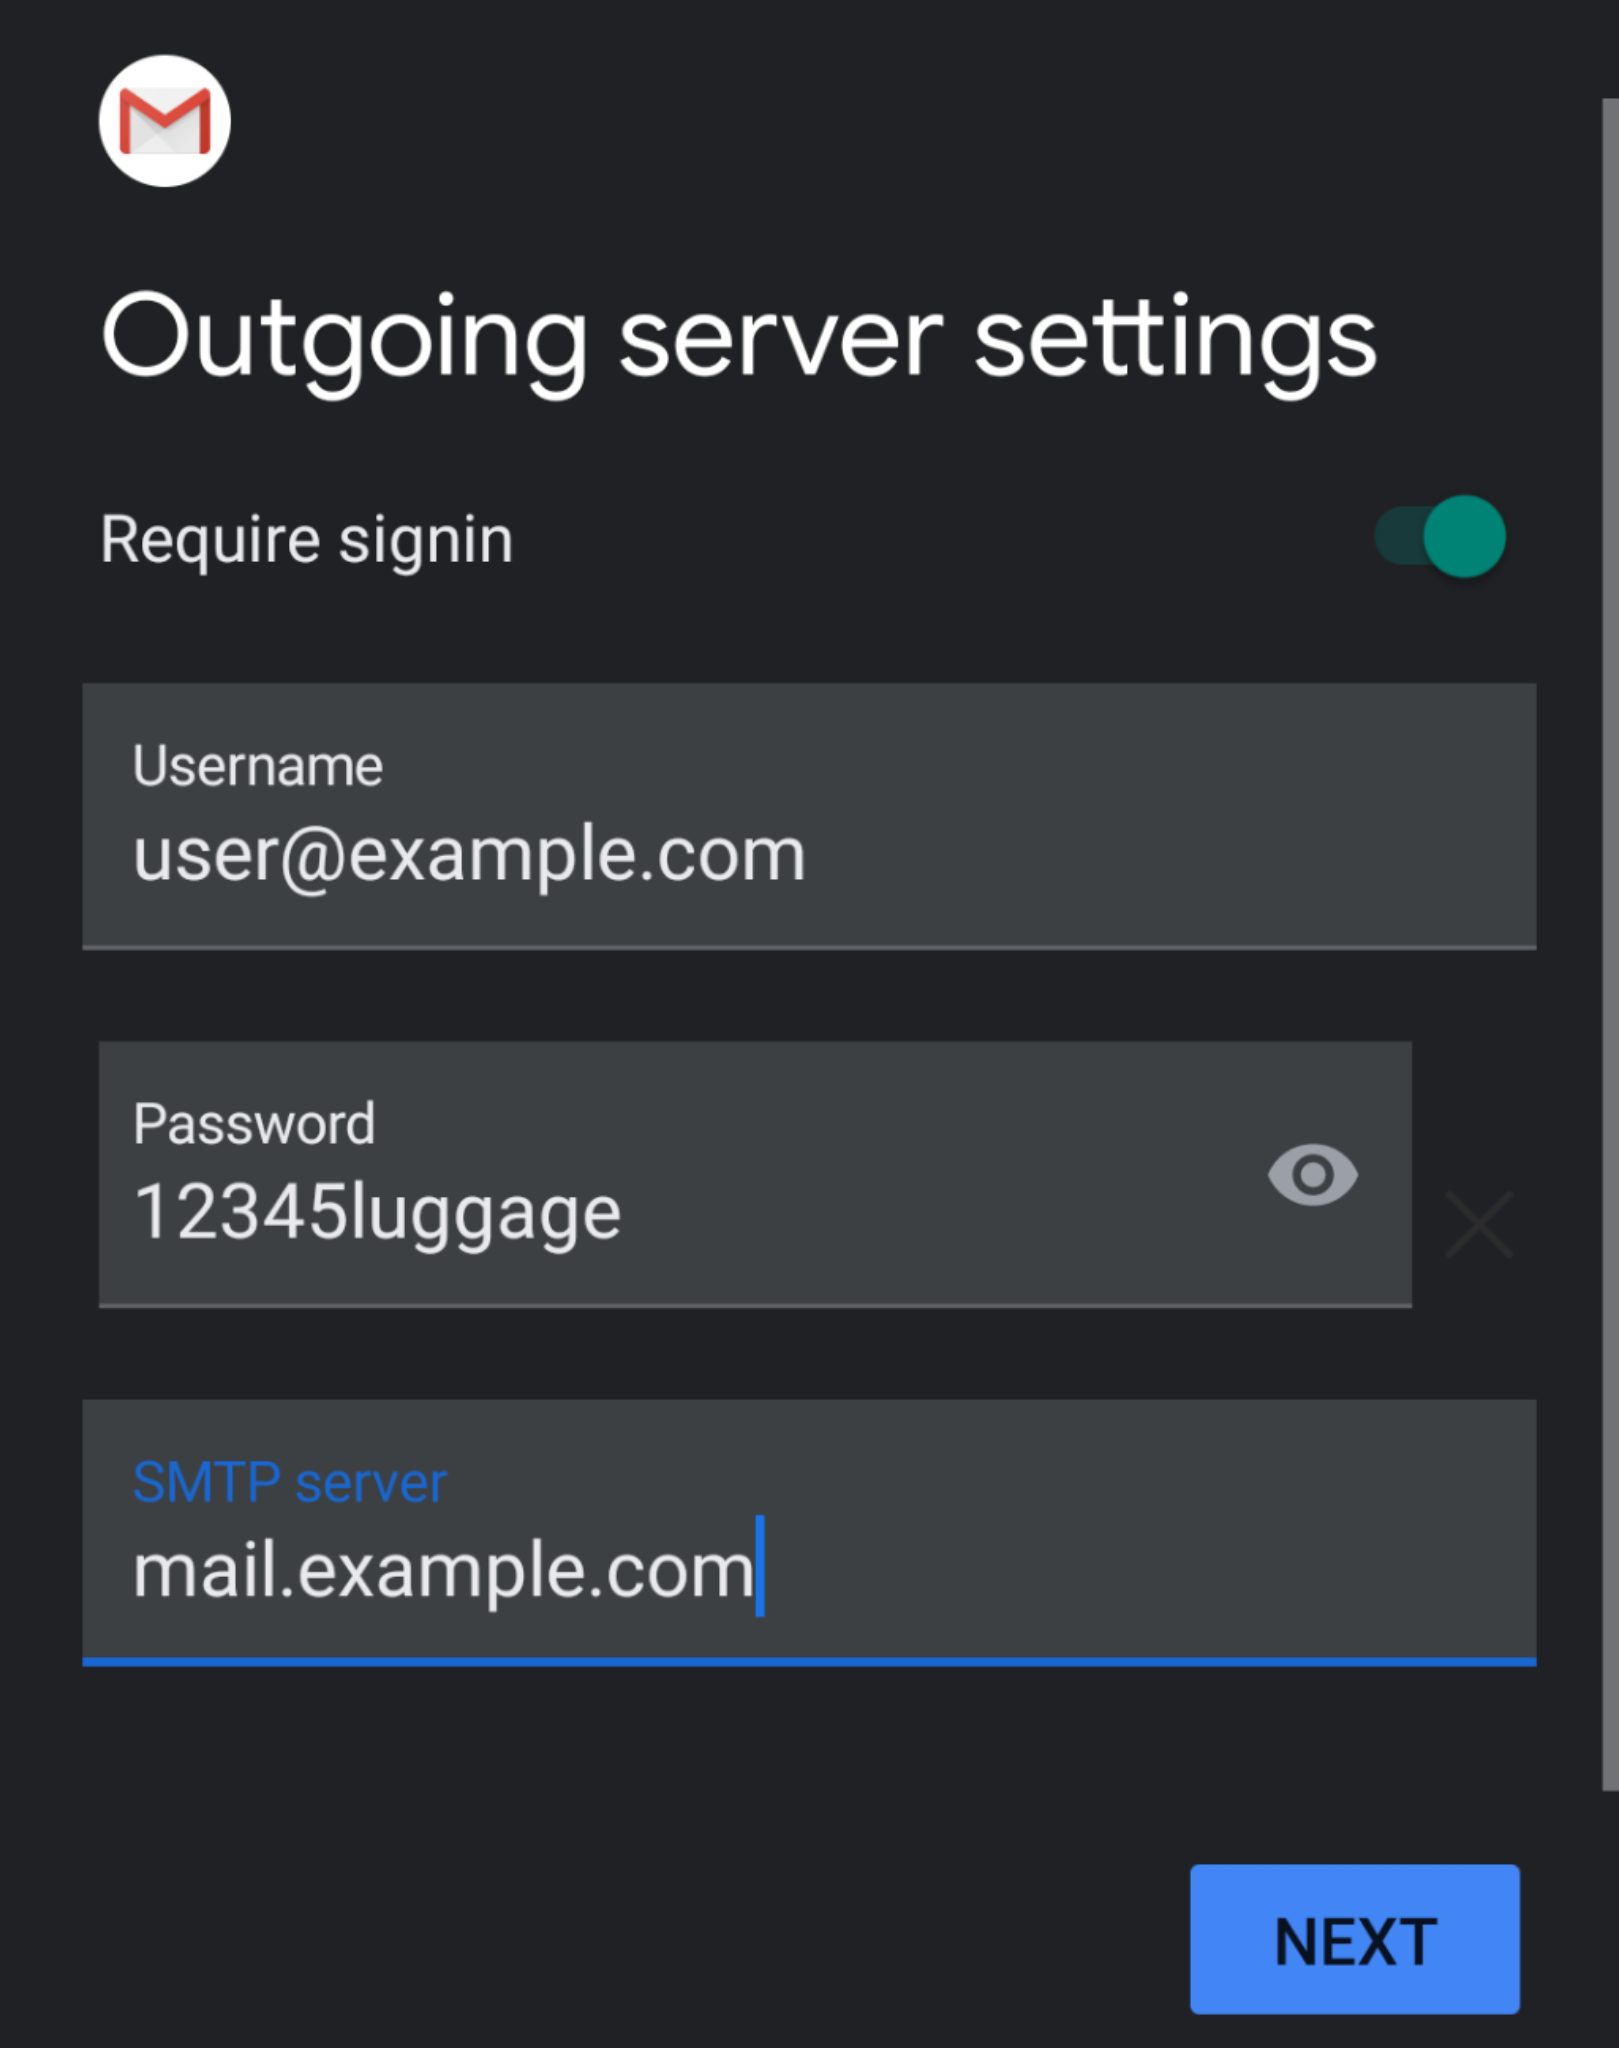
8.2. Tap Next and The Account options interface in step 9 below will appear.
9. Enter the following information in the Account options interface. you may set your desired sync frequency and email notifications.
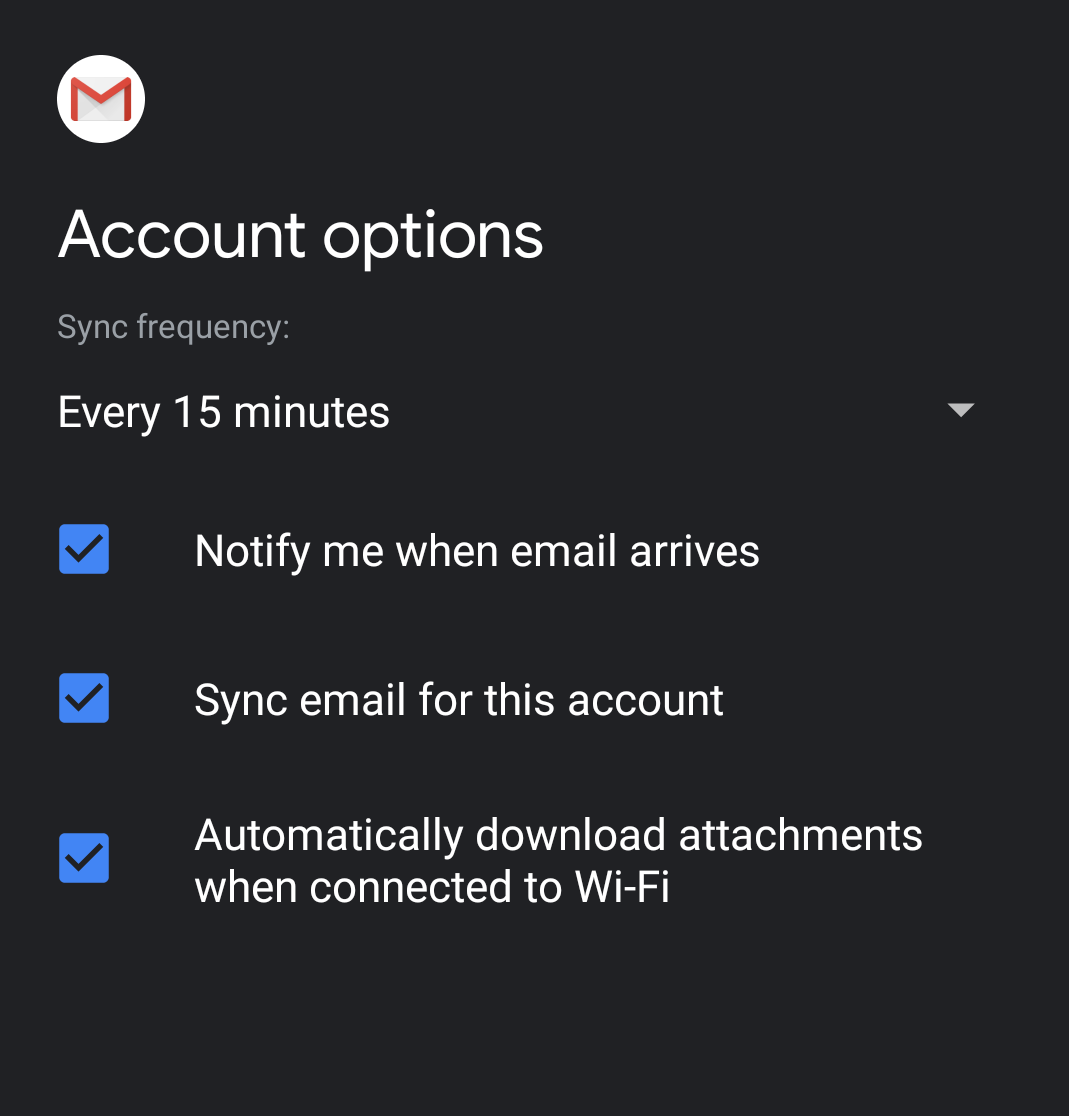
9.1. Tap Next. The confirmation page in step 10 below will appear.
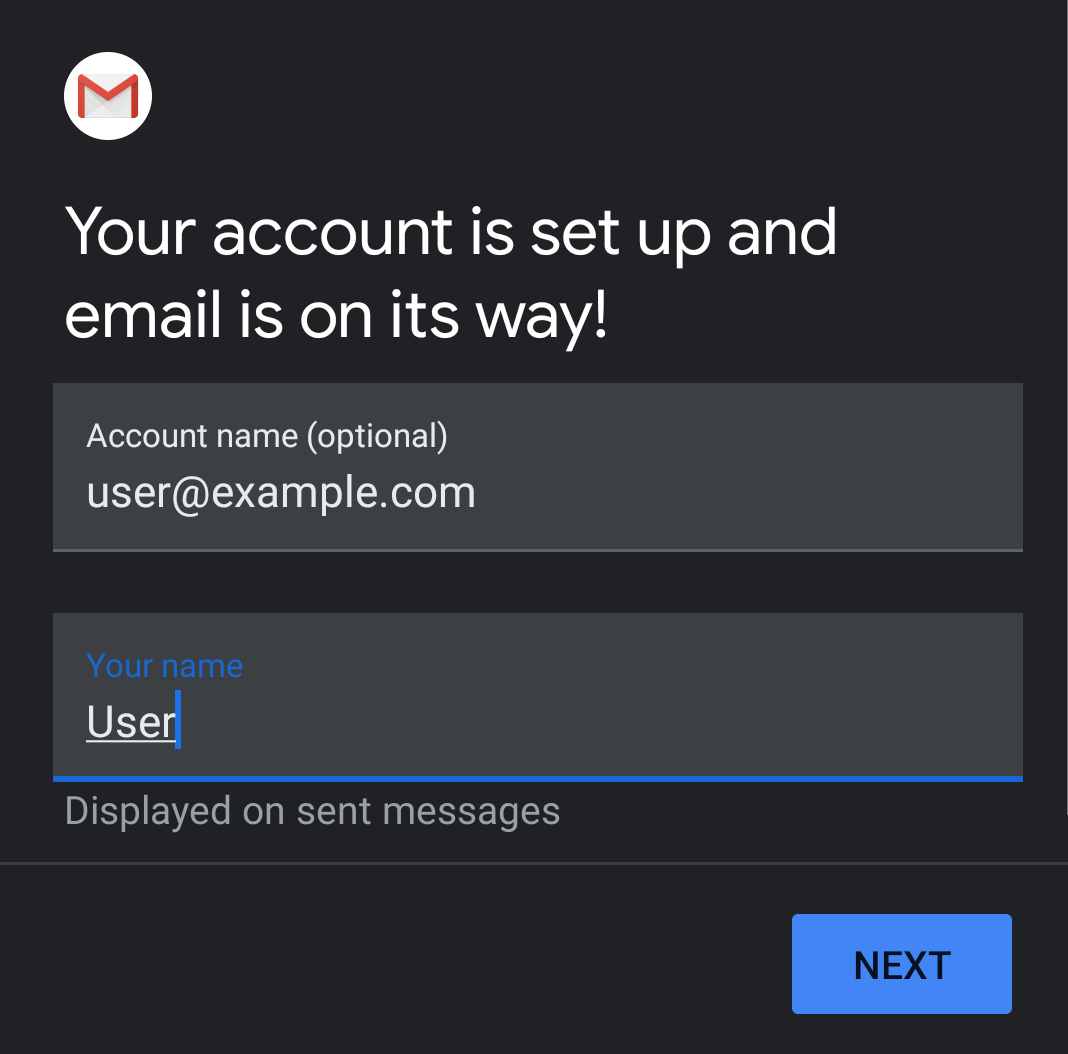
10. Set the information below to your desire, and tap Next ... Now your account is ready.