In this guide, we will share with you steps to register a new domain. But first, let's define what does registering a domain name mean, and the types of domain name extensions.
Registering a domain name is the process of reserving the name for your website (for example: mydomain.com) ... The main condition here is that if you want to register a new domain name, this domain must be available for registration and not taken by someone else. For instance, you cannot register google.org because it's already taken by Google.
There are different types of domain name extensions, for example .com , .net , .org , .store , and so on. From a technical perspective, no much difference between the types of domain extensions, but rather they just serve to illustrate the purpose of a website more precisely, for example, using a .store or .shop extension will highlight that your website represents a store or a shop, more than what .org would do.
How to Register a New Domain:
Note: Registering a domain name is just reserving the name, in other words, the domain is not going to function unless pointed to a web server (i.e: linked with a hosting plan or a server).
This guide assumes you only want to register a domain. If you want to also order a hosting plan from us, we have another guide for that purpose.
Step 1:
Visit the Domain Check page:
https://dash.wevrlabs.net/cart.php?a=add&domain=register
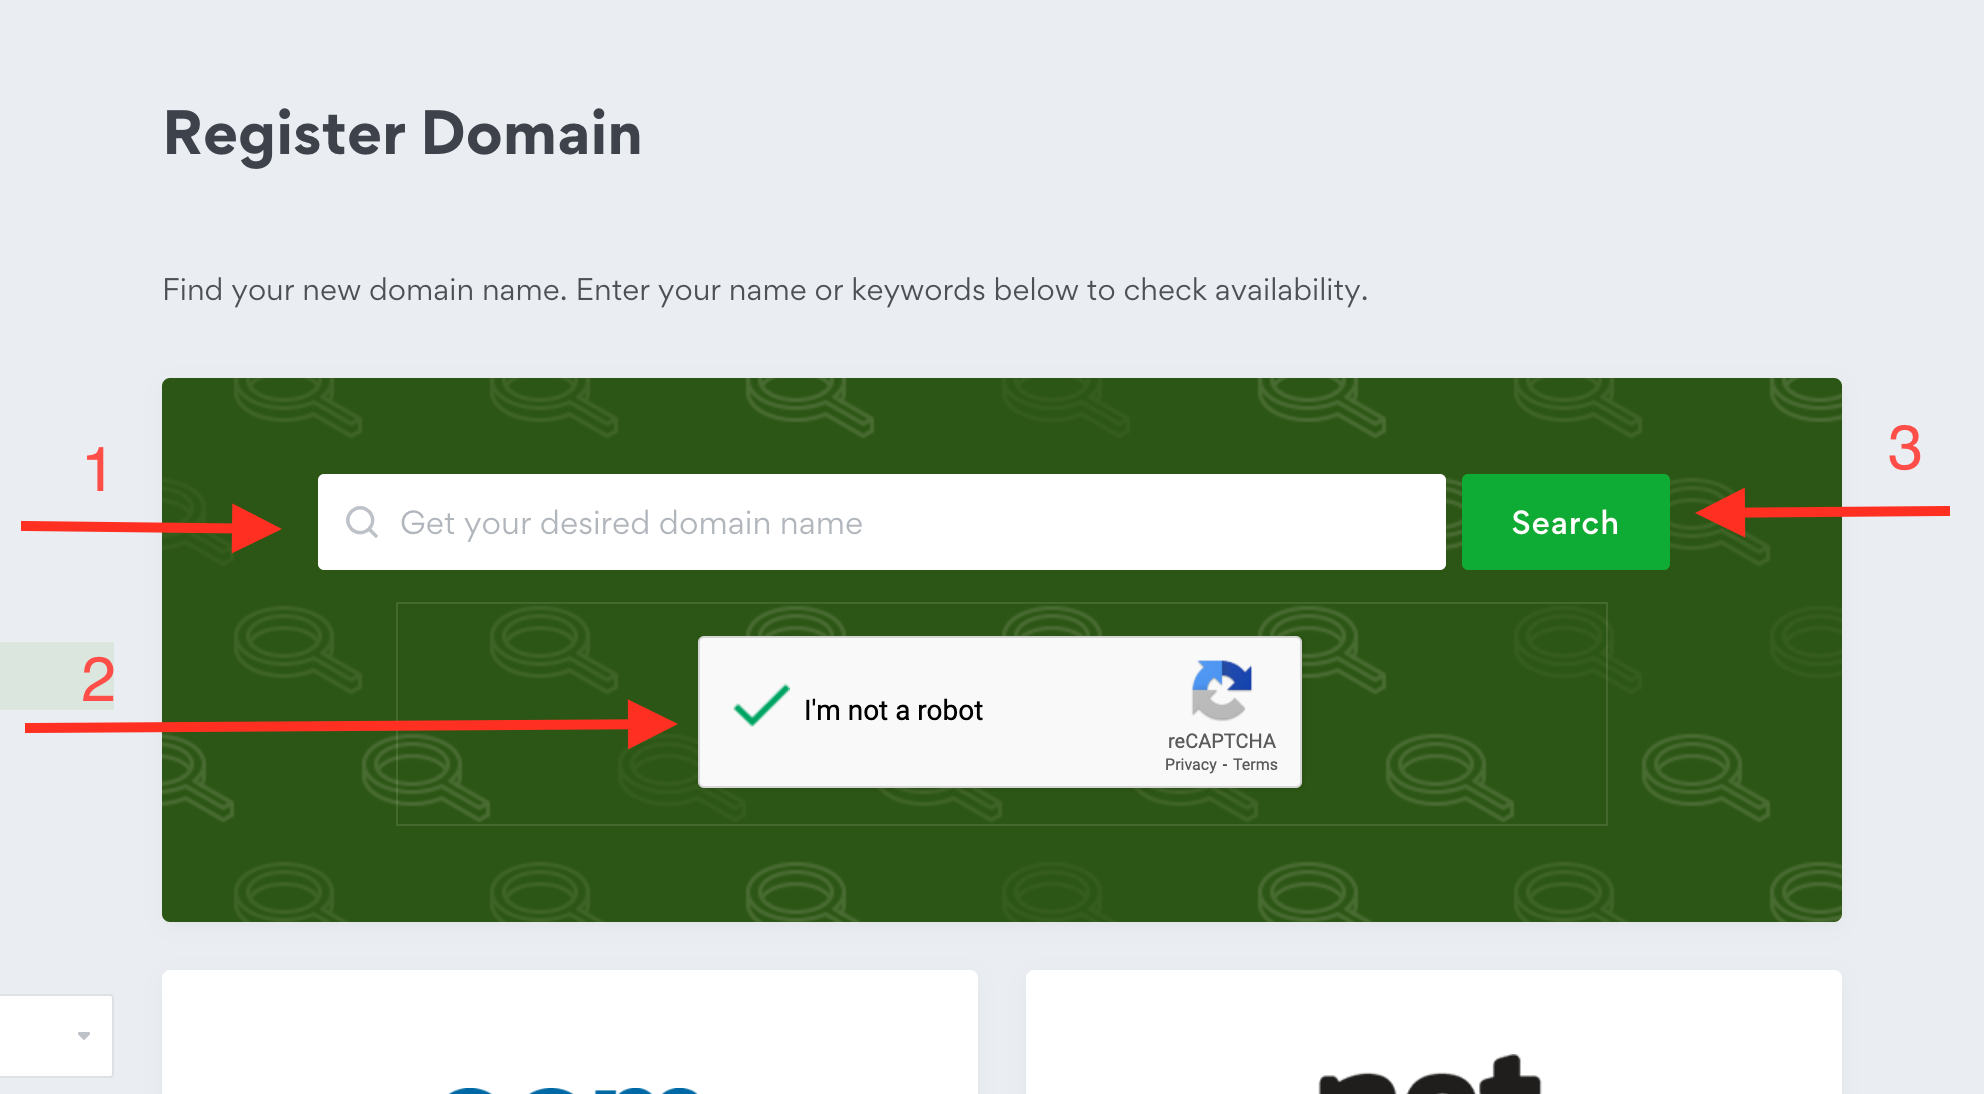
- First enter your desired domain name in the search (example:
mywebsite.com). - Next, check the
I'm not a robotbox (note that if you are logged in to your account, this box may not be present so it can be skipped). - Click the
Searchbutton.
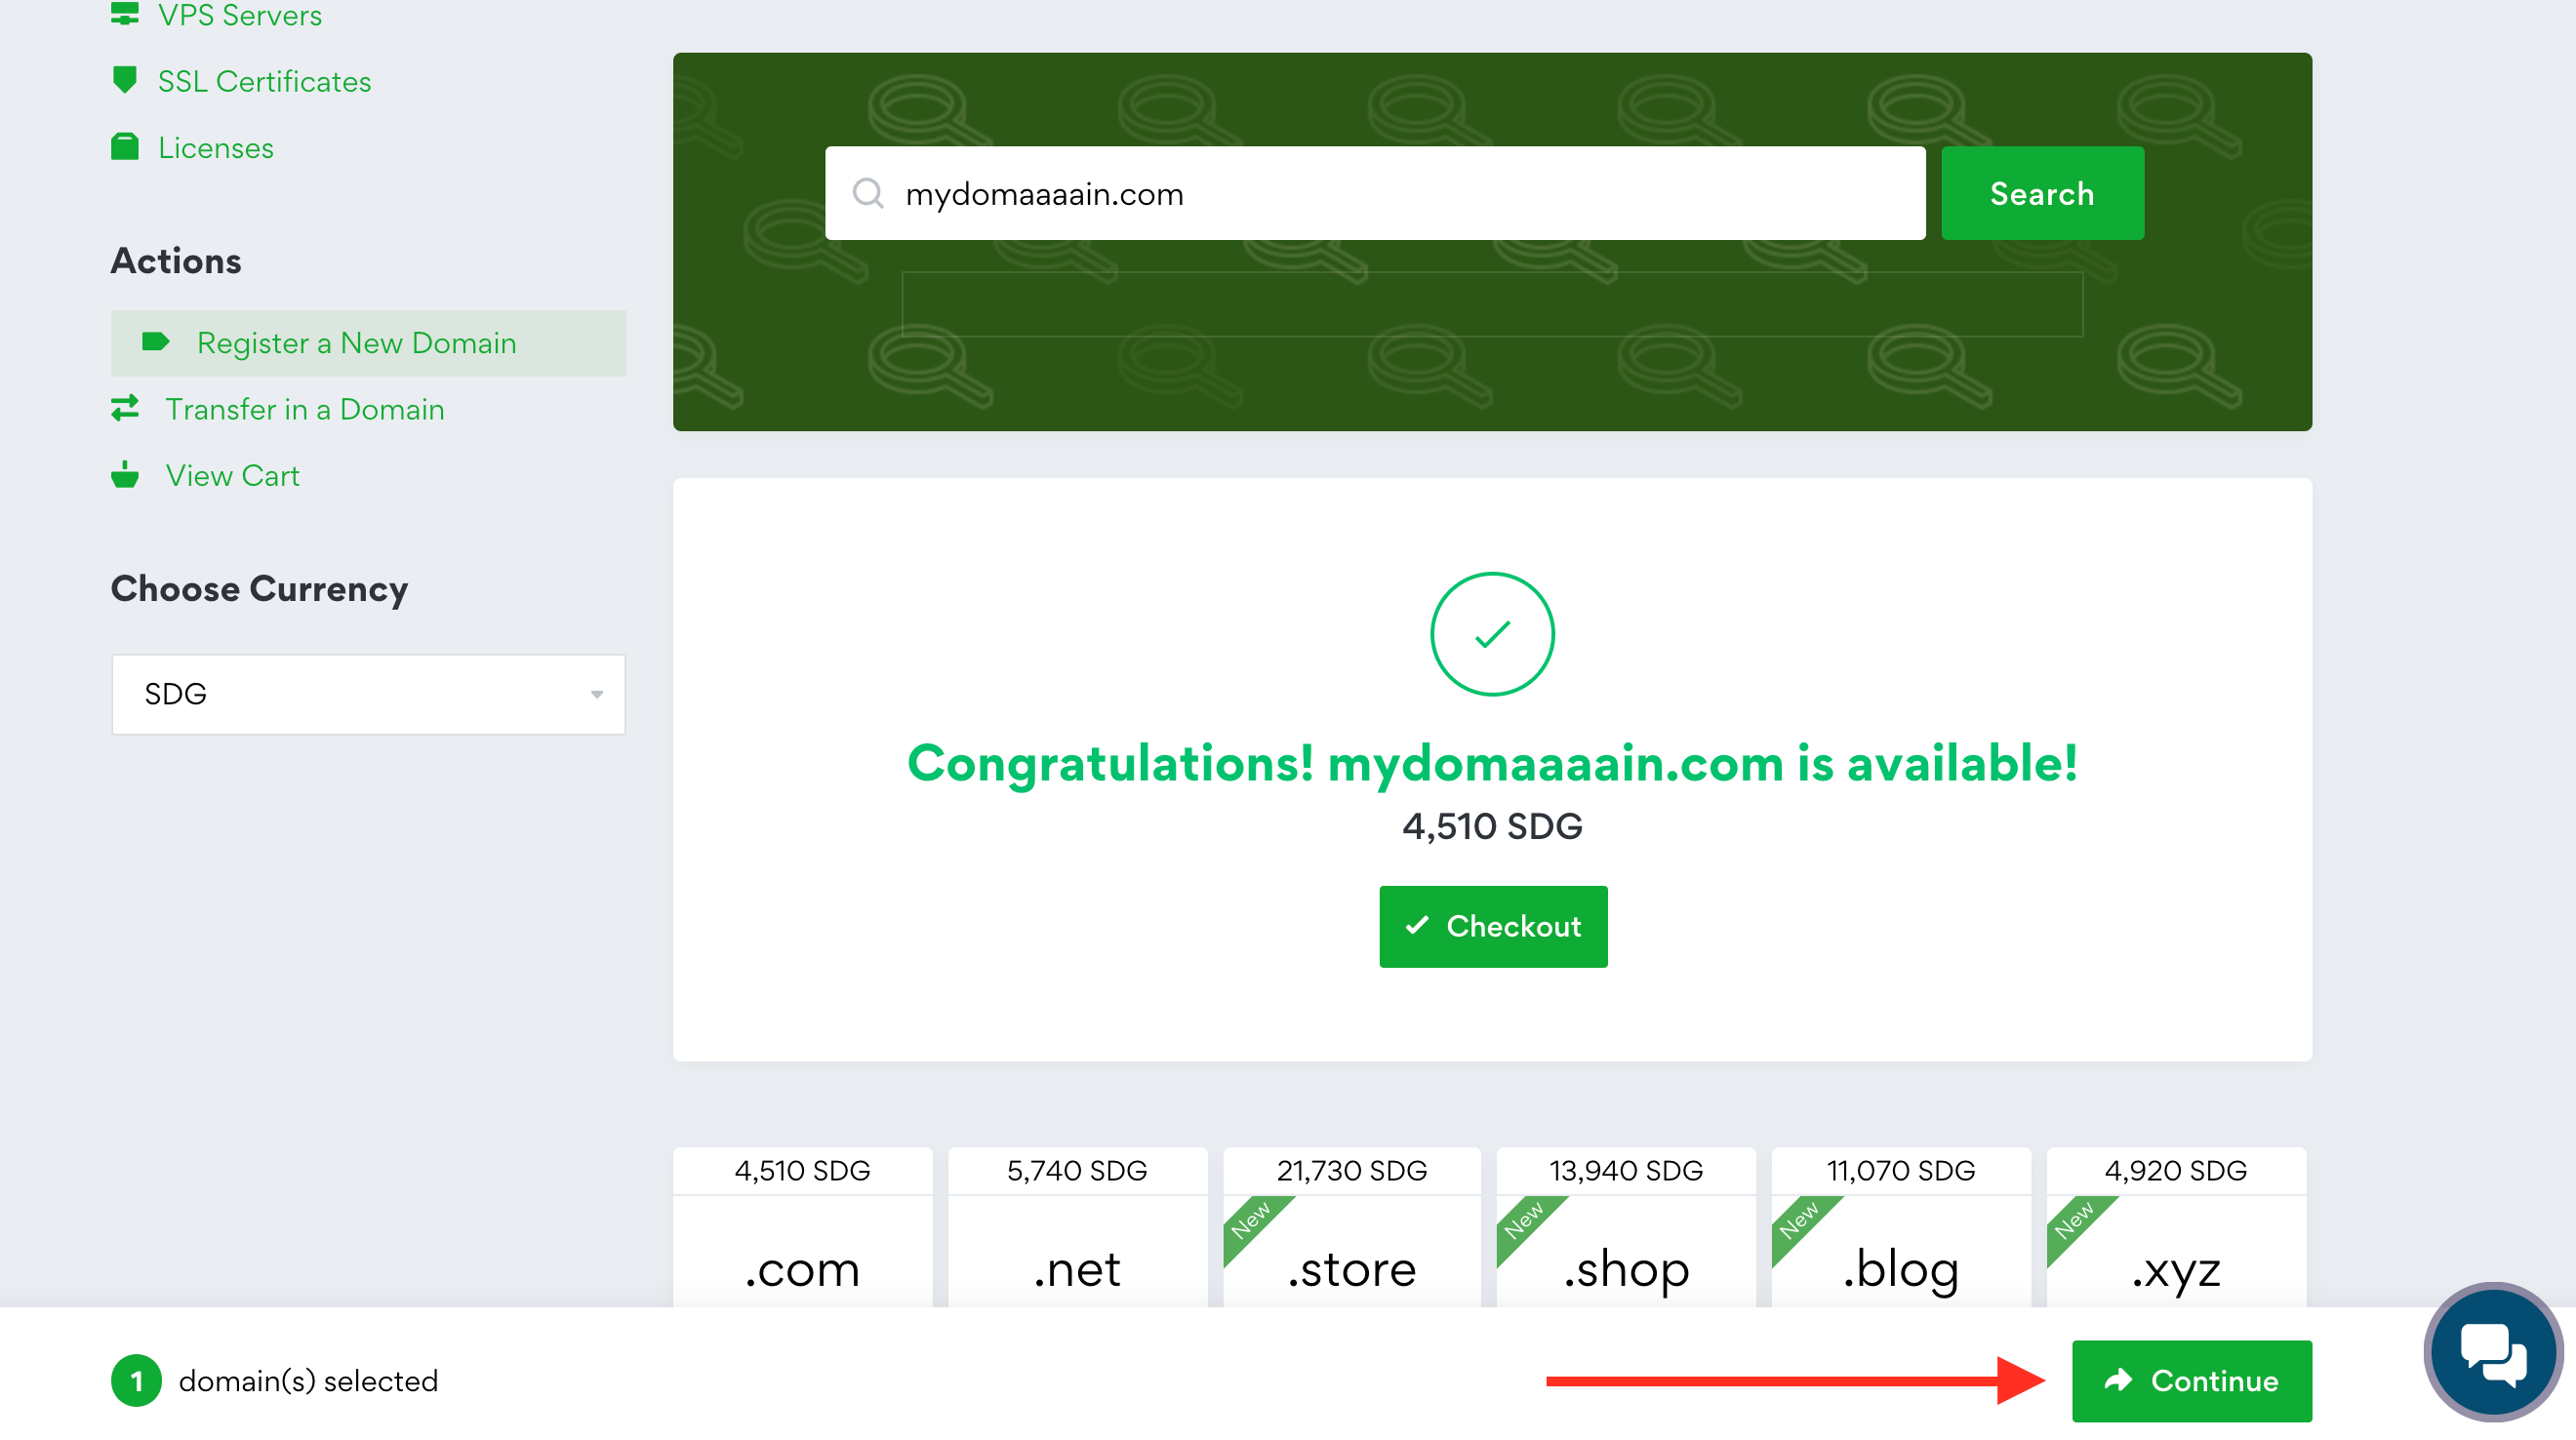
Step 2:
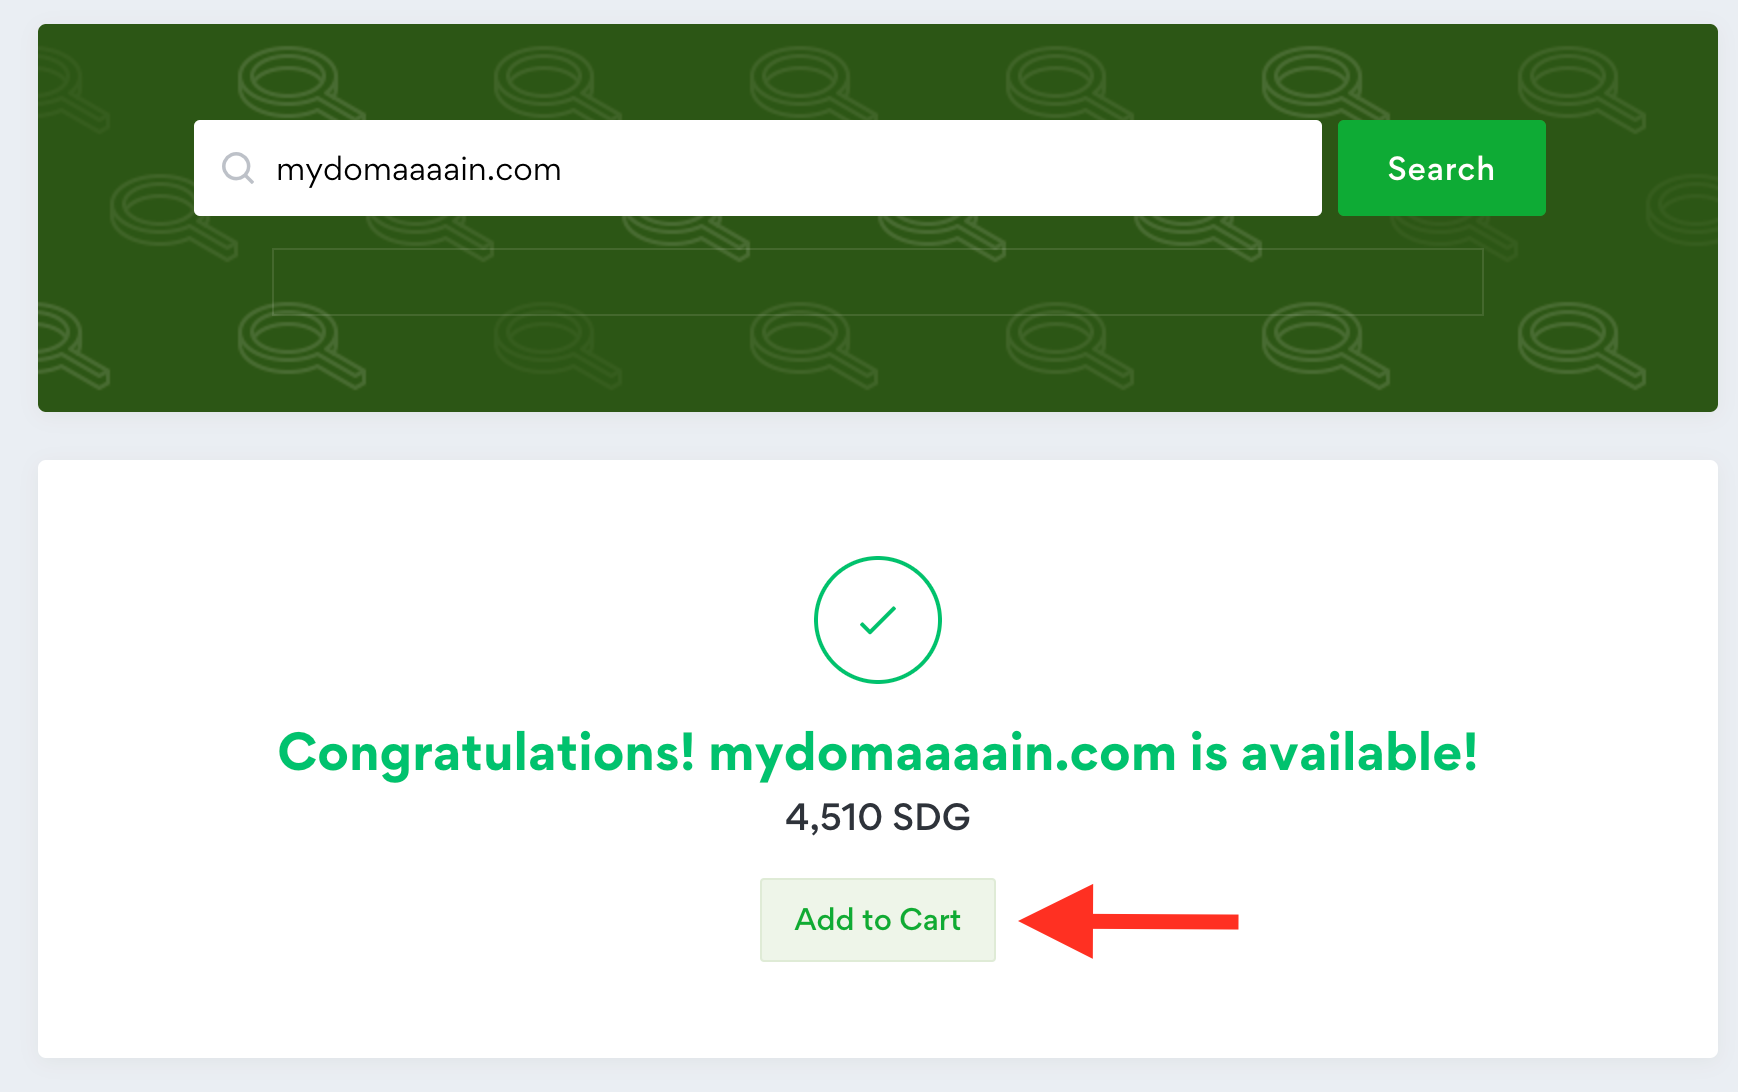
Search results will then appear. If your desired domain is Available , click the Add to Cart button.
If your domain is Not Available:
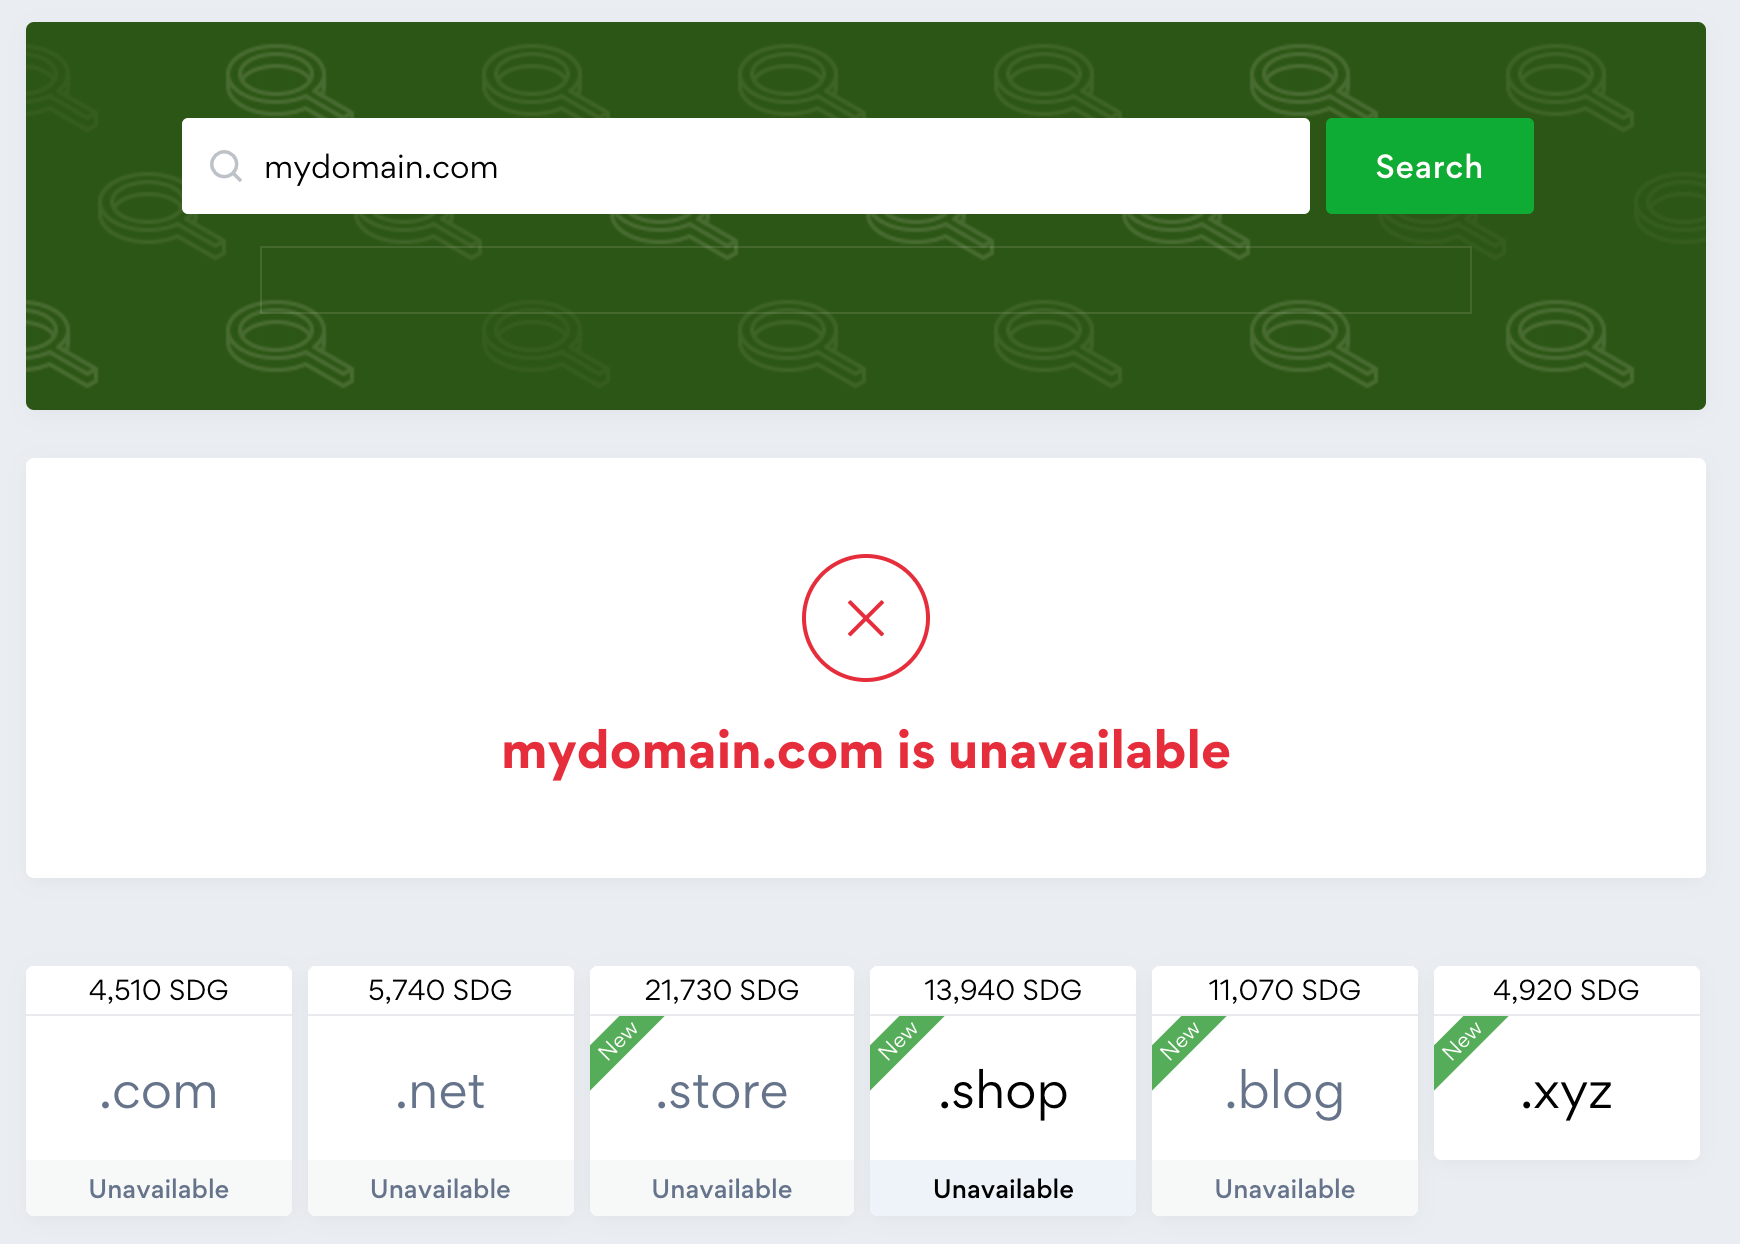
repeat the search steps until you find a suitable result ... Alternatively, you can scroll down and explore some of the other suggestions.
After clicking the Add to Cart button, click the Continue button on the bottom corner of the page to proceed to next steps.
Step 3:
Next step is configuring your domain.
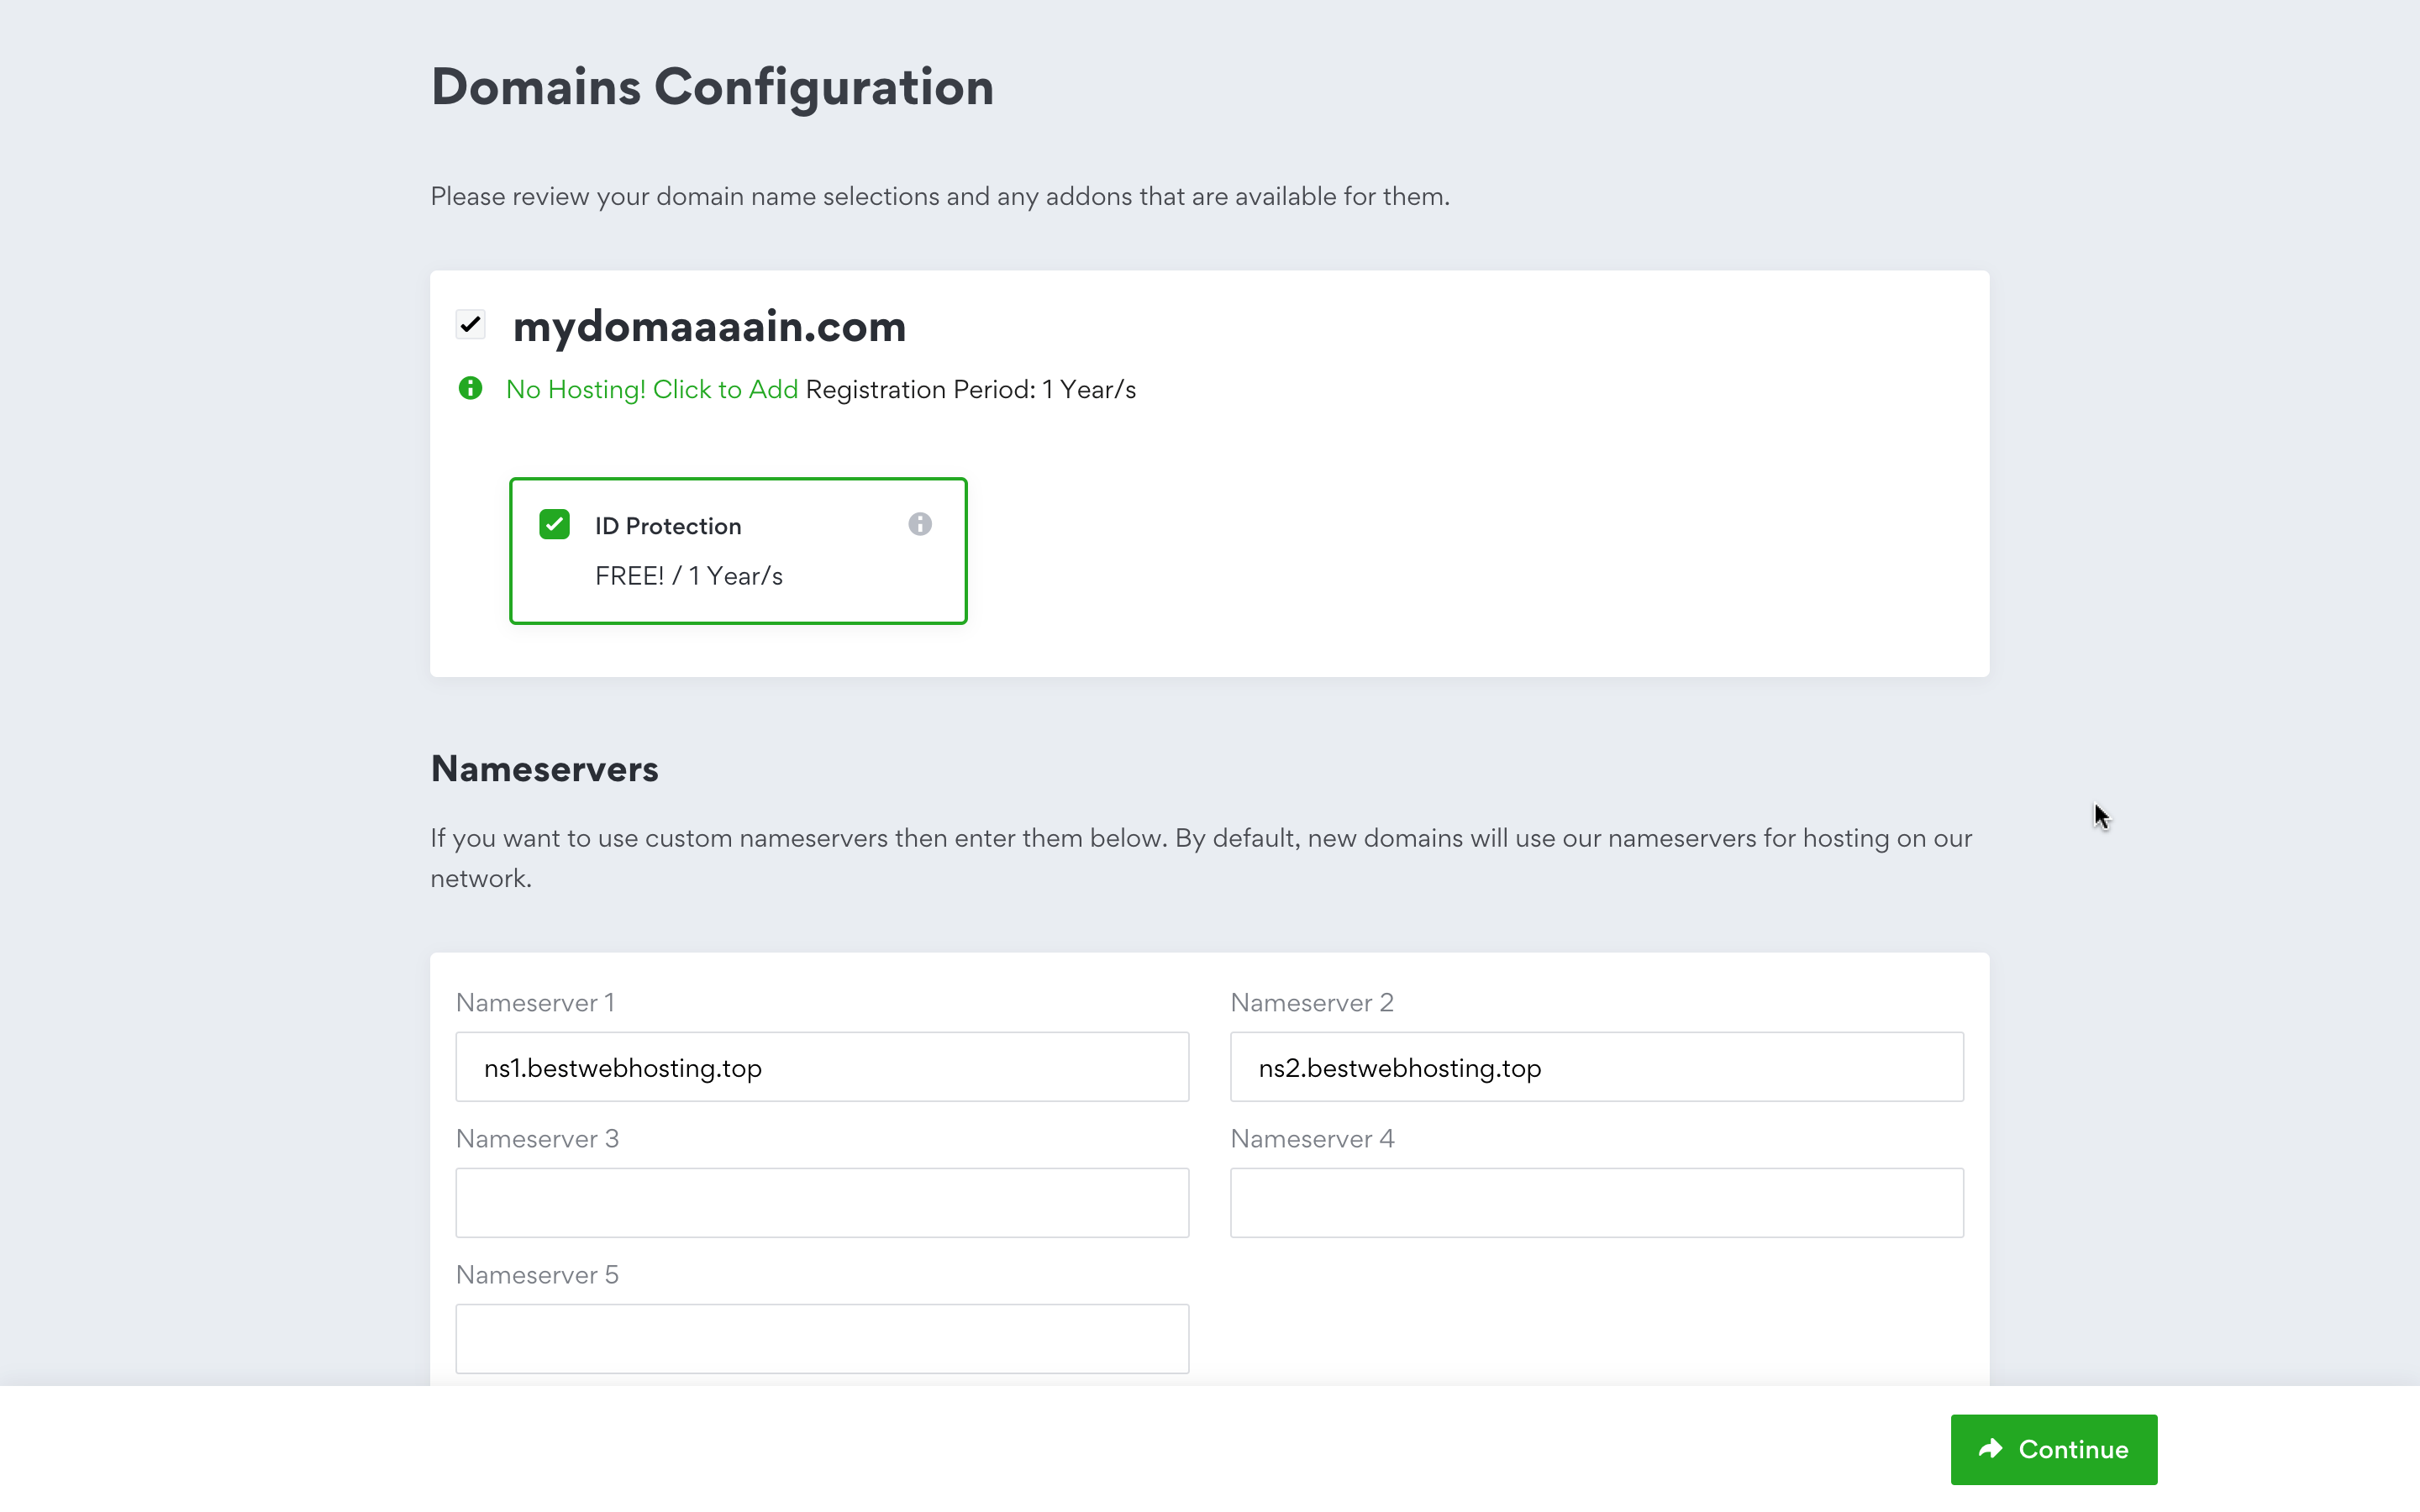
- ID Protection: this is optional, but it's recommended to be enabled.
- Nameservers:
- Name servers are required for linking your domain with hosting service or a server. By default, our name servers will be filled in this step, but these are only required if you will be ordering a Shared Hosting or a Business Hosting plan from us in the future.
- So you can change these to something else if you will be hosting your domain with another provide. Your provider should supply their name servers for you to use on your domain.
After configuring your domain, click Continue to proceed to next steps.
Step 4:
Final step is review and checkout.
1. Billing Details
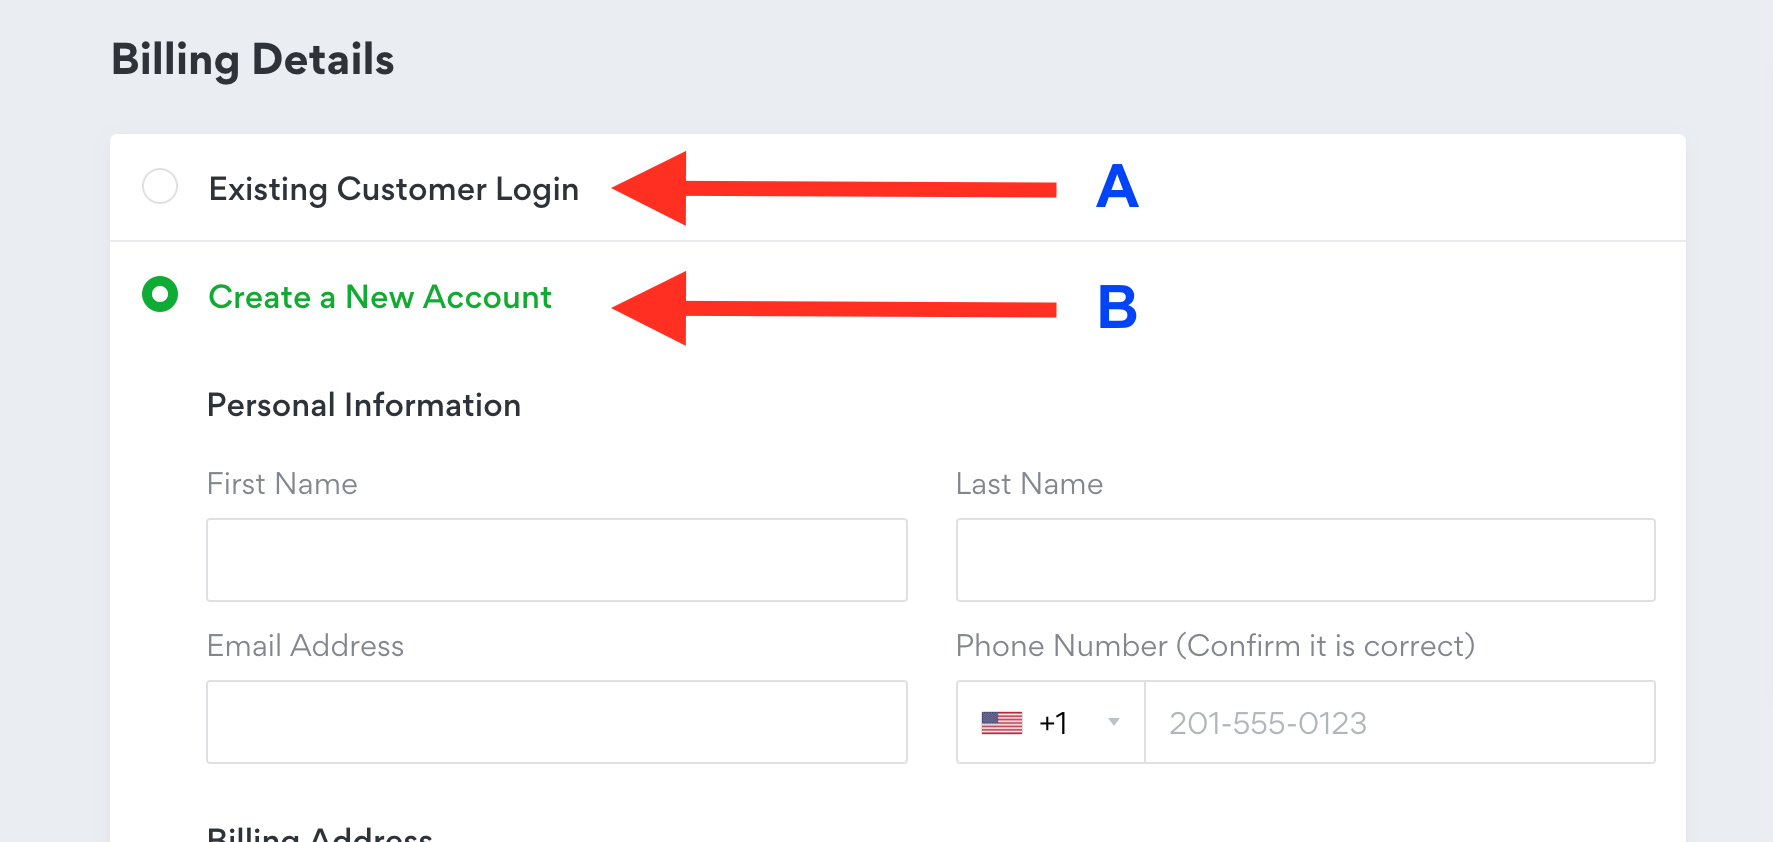
- select option
Aif you already have an account with us. - Select option
Bif you are a new client, then fill out the required info.
2. Payment Method:
Select your desired payment method from the list. Depending on the payment method selected, further instructions will be displayed in the invoice details page after you checkout and submit the order.
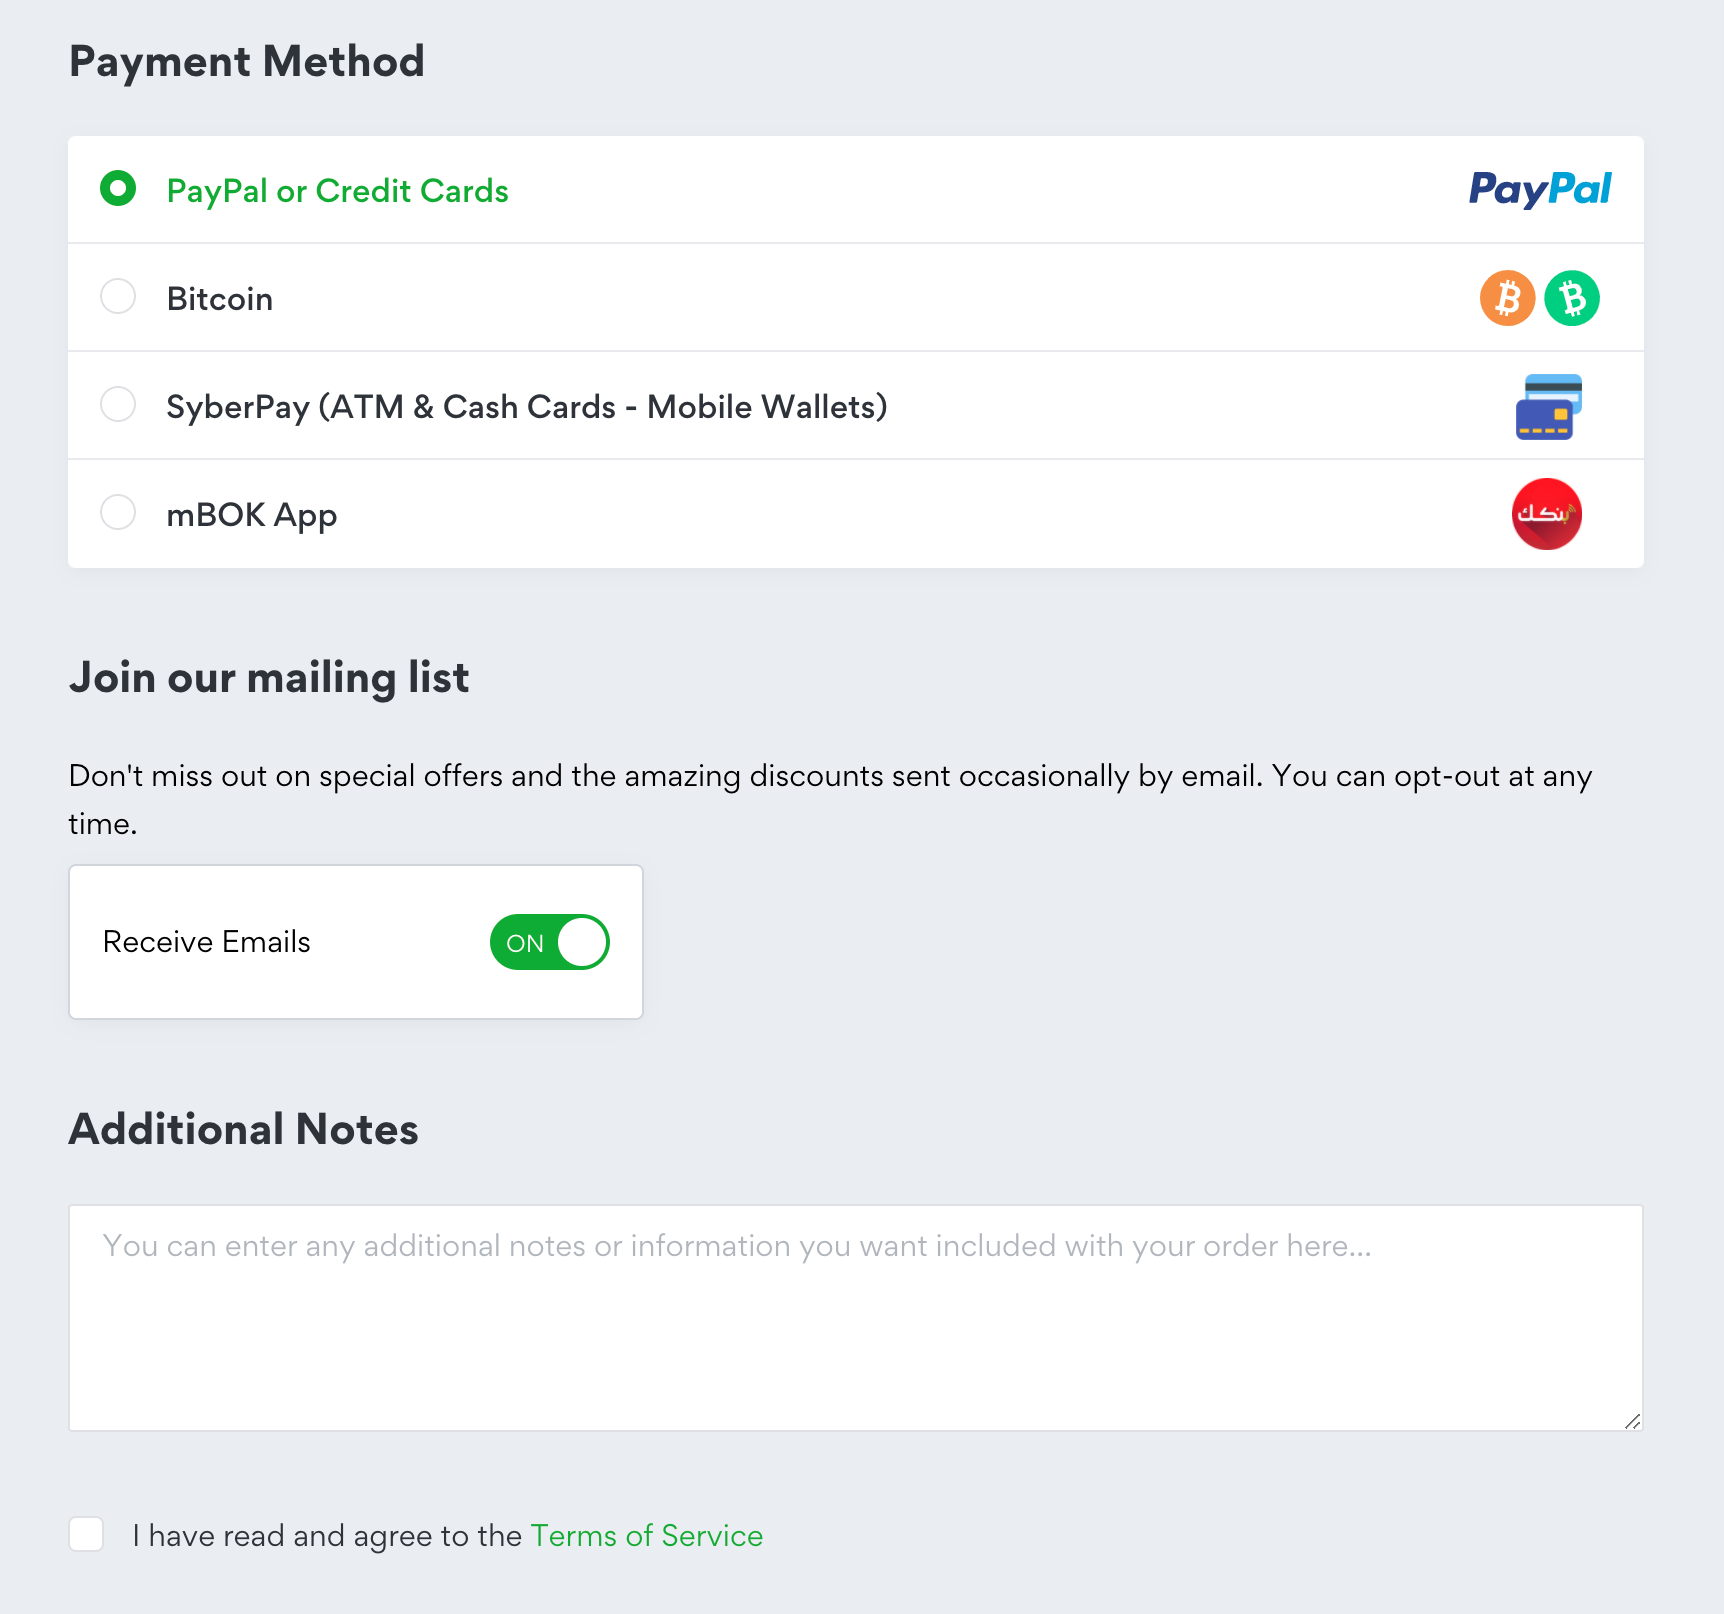
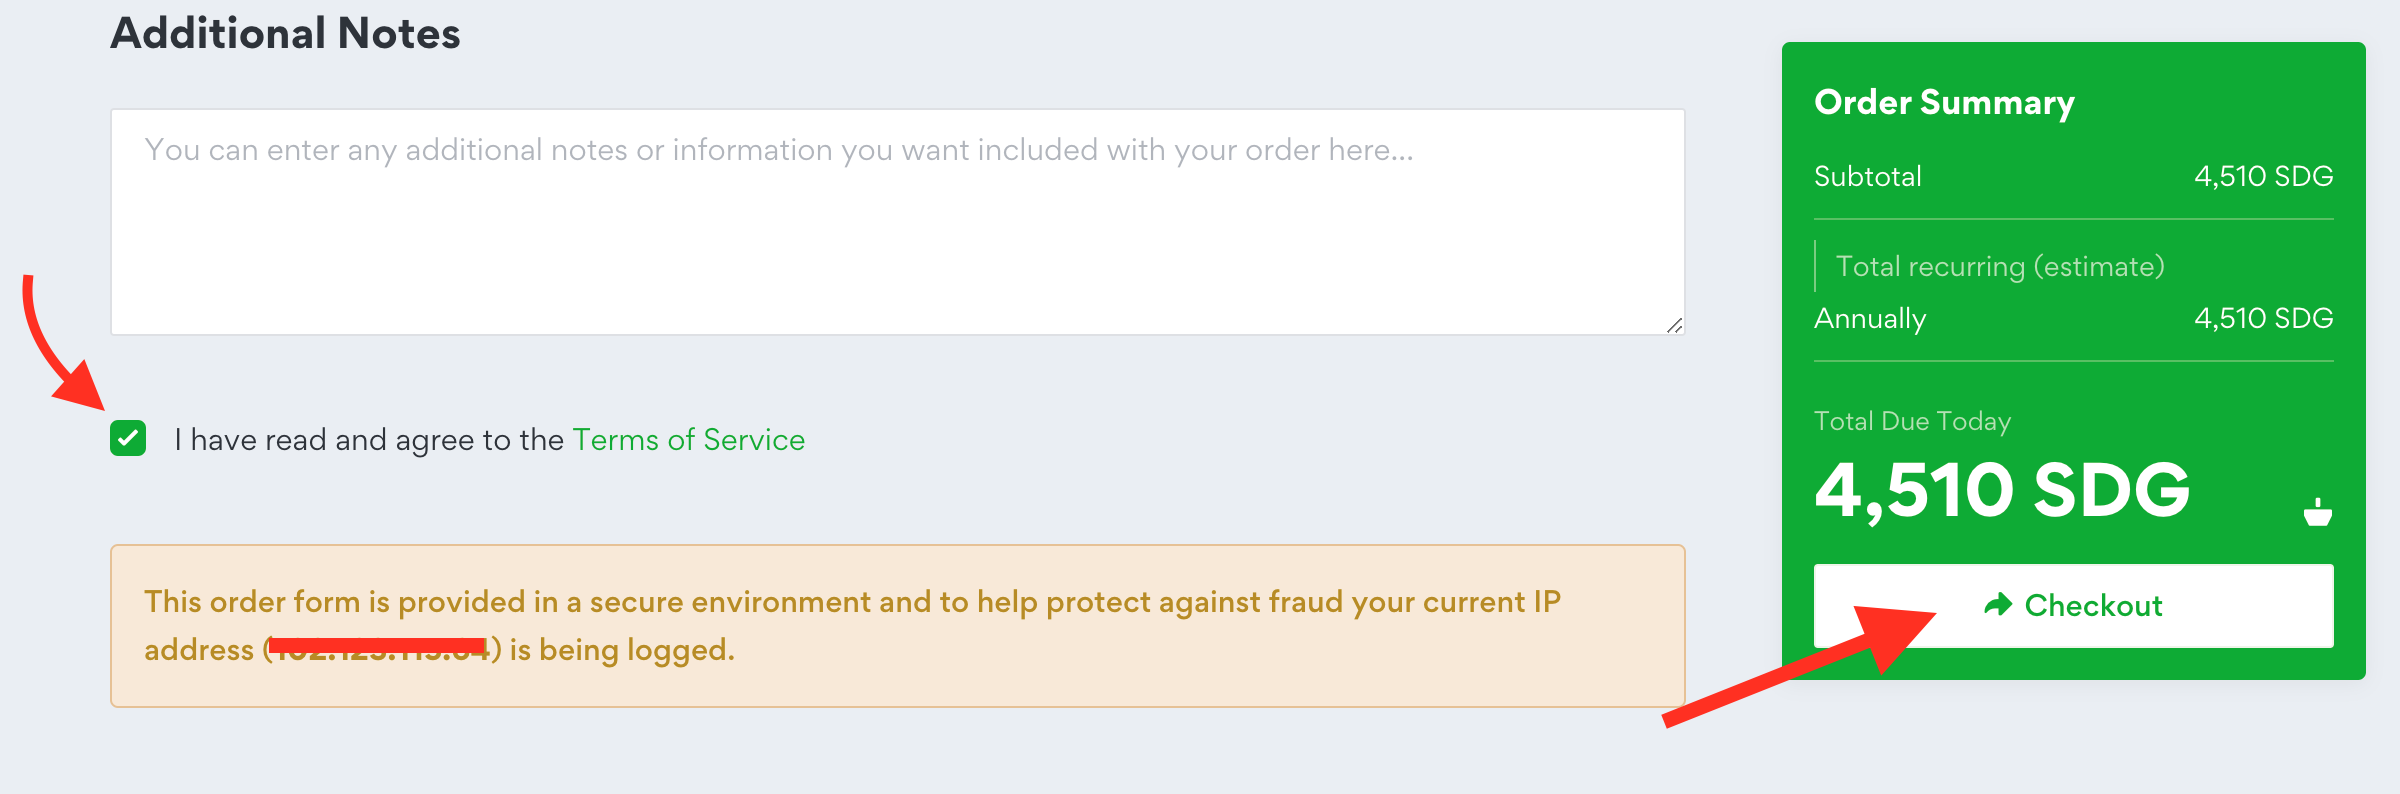
The rest (mailing list and Additional Notes) are optional.
The checkbox of Terms of Service is required. Make sure your carefully read the Terms of Service, and then tick the box to be able to proceed.
After completing all the required info, click on the Checkout button, after which you will be redirected to the invoice page for making the payment. Depending on the payment method selected, further instructions will be displayed in the invoice details page.