In this guide, we will share with you the steps to transfer a domain to us. First, we would like to emphasize that transferring a domain name does not mean transferring the services associated with it (website, emails, etc). Transferring a domain simply means switching domain management (name servers, contacts, renewal, etc) from one provider to another.
If you would like to also migrate the hosting of your domain to us, please take a look at our Migrate to Us guide in this link below:
https://dash.wevrlabs.net/knowledgebase/4809/How-to-migrate-your-hosting-to-us.html
Before you begin, first make sure your domain meets all the requirements in the checklist regarding domain transfer process. You can find it here:
https://dash.wevrlabs.net/knowledgebase/4787/Requirements-for-Transferring-a-Domain-to-Us.html
Step 1:
Visit the Domain Transfer page:
https://dash.wevrlabs.net/cart.php?a=add&domain=transfer

- enter your domain name in the first box (example:
google.com). - Click the
Transferbutton.
Step 2:
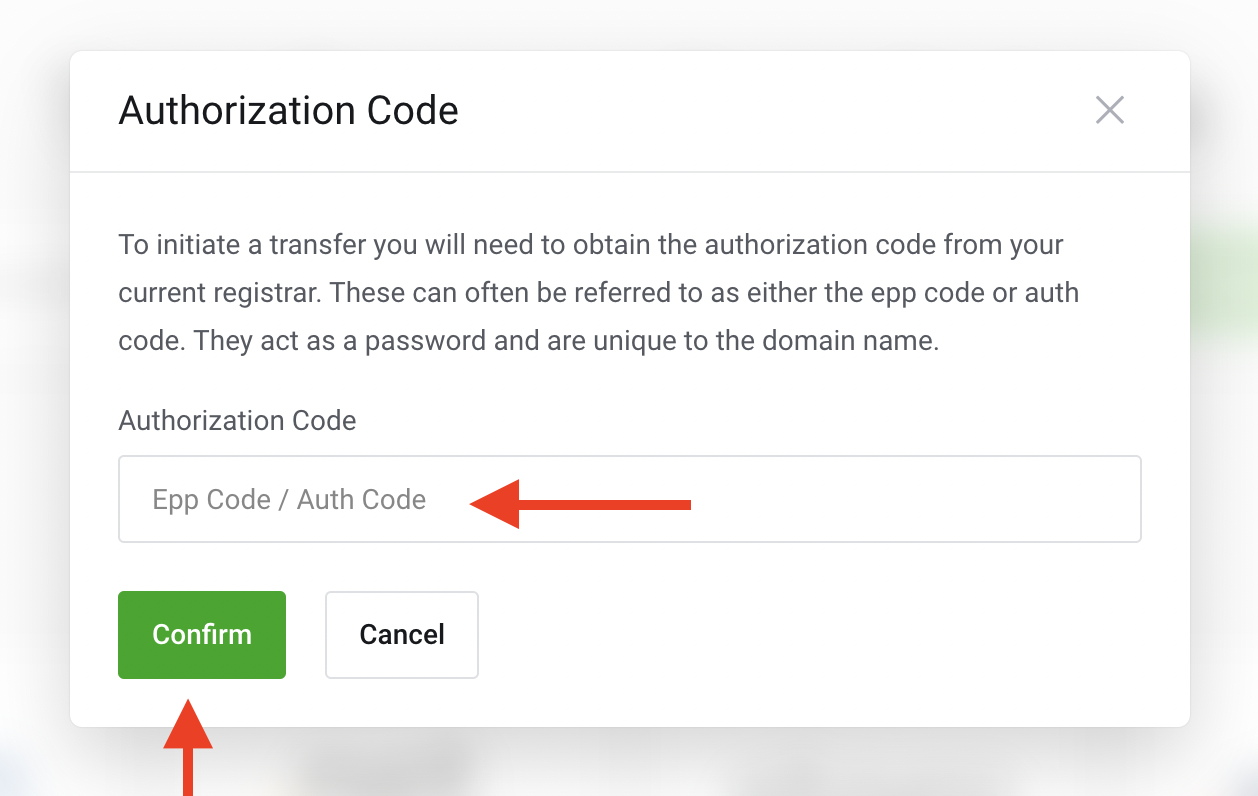
You will be asked to provide the EPP Code ... This can be obtained from your current domain provider (sometimes it's called the Authorization Code). Please contact your domain provider for this information.

Click Conform and you will be taken to the next step, which is configuring your domain.

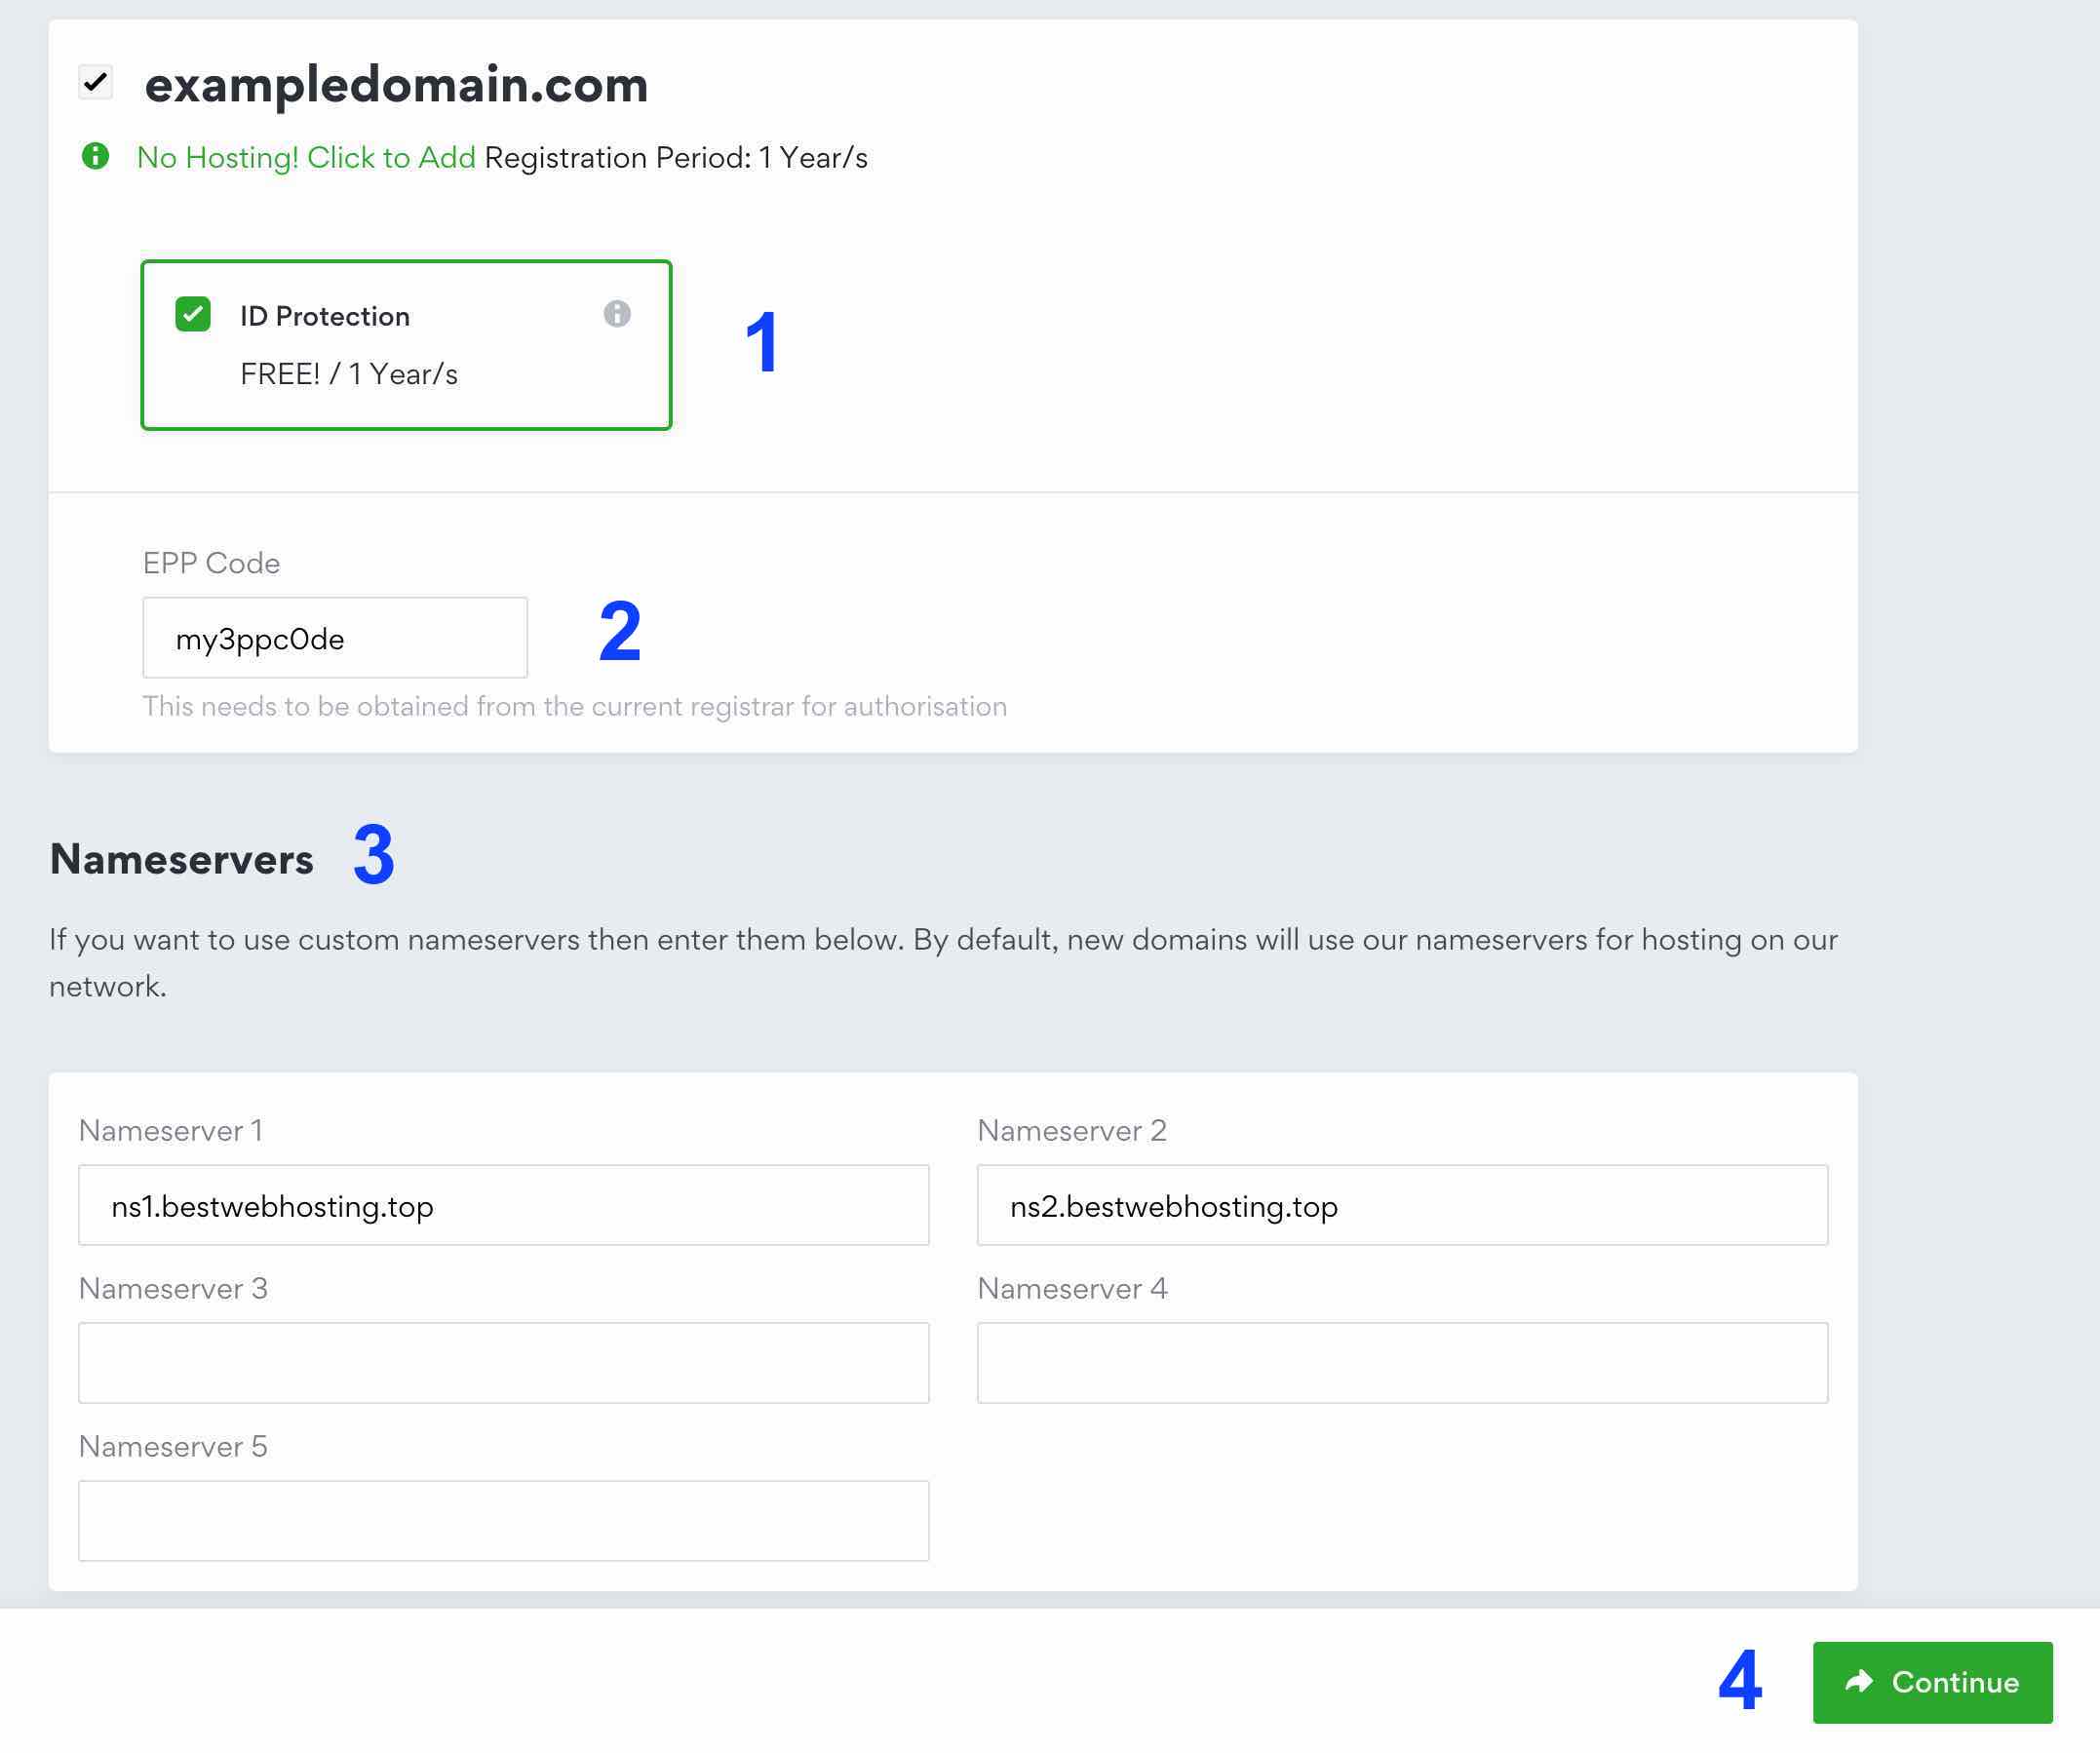
- ID Protection: this is optional, but it's recommended to be enabled.
- EPP Code: once again review your EPP code.
- Nameservers:
- Name servers are required for linking your domain with a hosting service or a server. By default, our name servers will be filled in this step, but these are only required if you will be ordering a Shared Hosting or a Business Hosting plan from us in the future.
- Note that these name server settings here will not take effect unless the domain transfer is completed (within 6 - 7 days from the day your current provider approves the transfer request).
- Also note that if you wish to keep the services of the domain where they currently are without change, make sure to enter the current name servers associated with the domain, instead of ours, this is to avoid service disruption as a result of name servers being updated to ours after transfer completion.
After configuring your domain, click Continue to proceed to the next steps.
Step 3:
The final step is review and checkout.
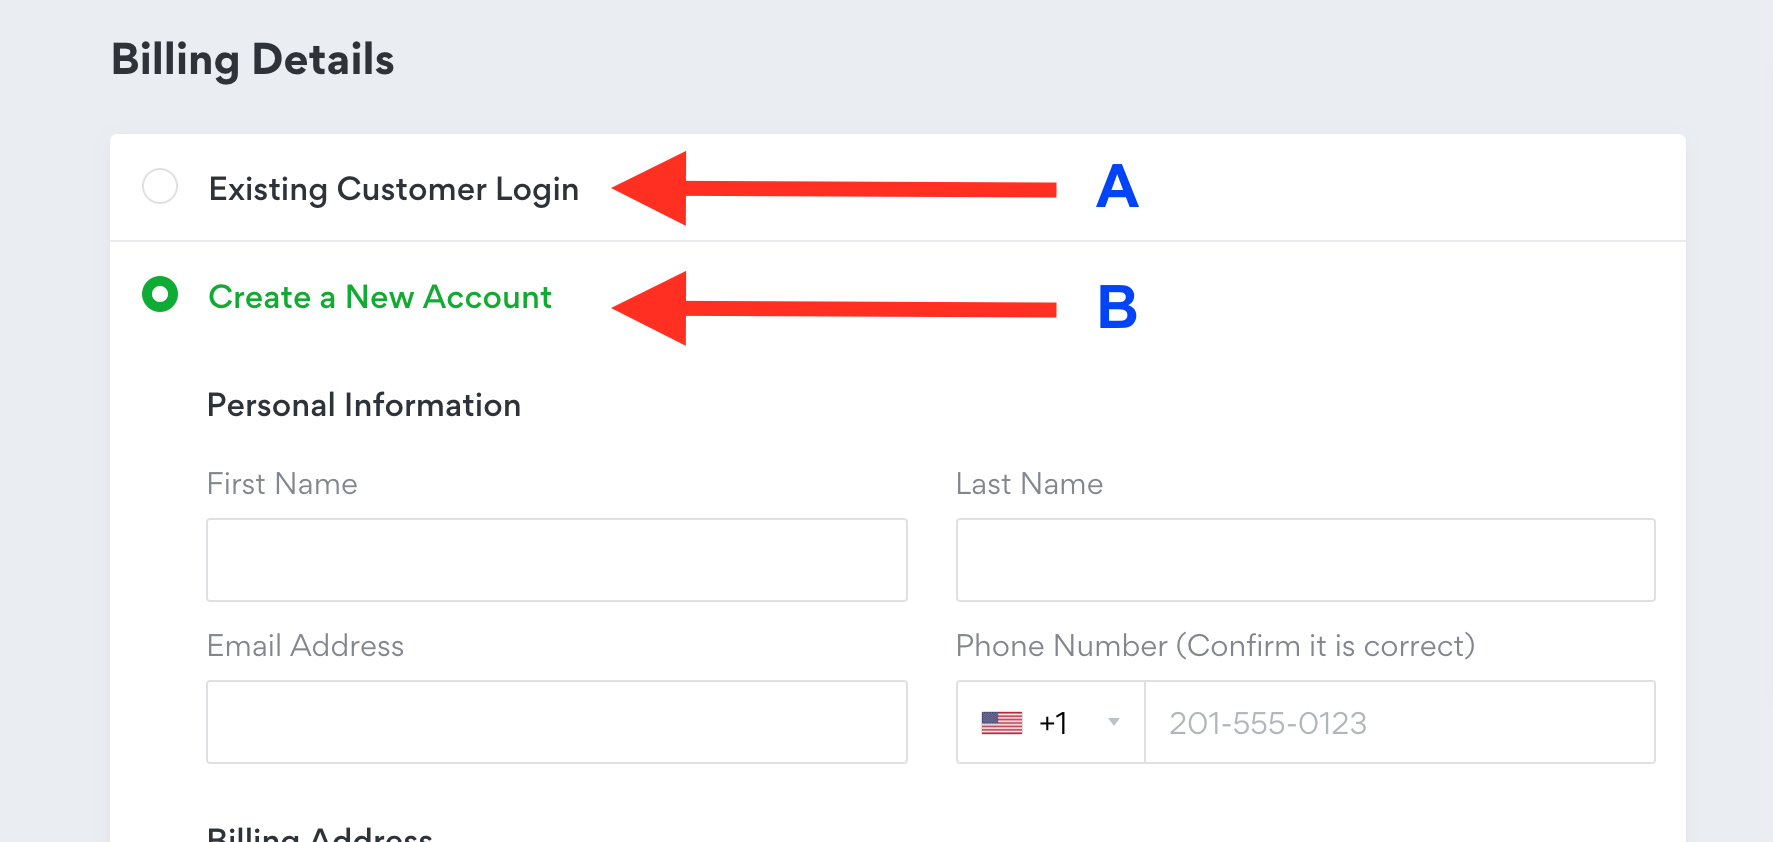
1. Billing Details

- select option
Aif you already have an account with us. - Select option
Bif you are a new client, then fill out the required info.
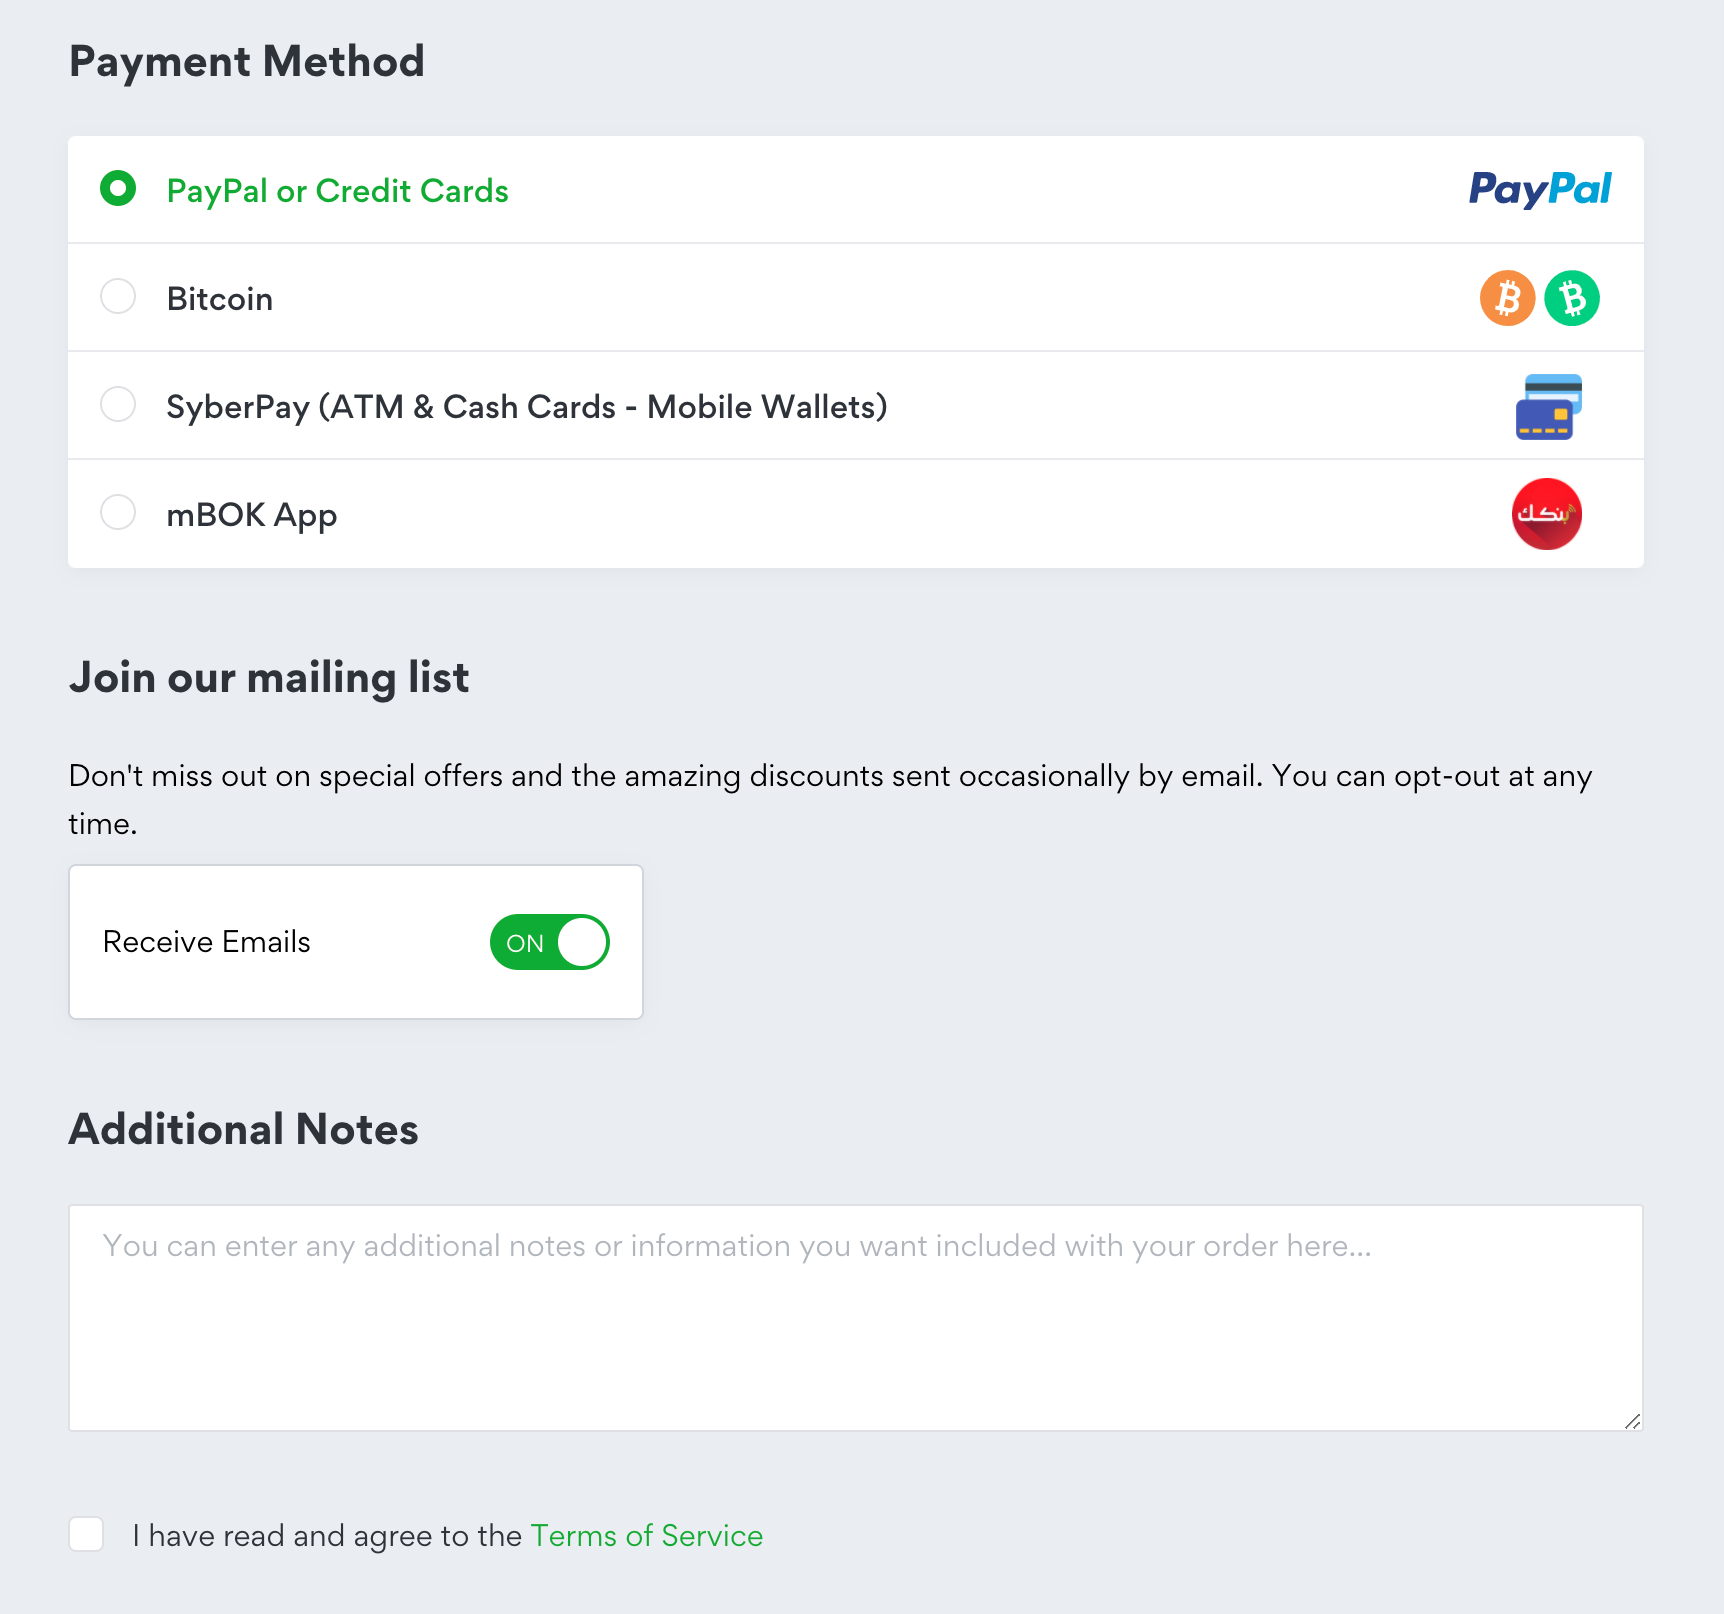
2. Payment Method:
Select your desired payment method from the list. Depending on the payment method selected, further instructions will be displayed in the invoice details page after you checkout and submit the order.

The rest (mailing list and Additional Notes) are optional.
The checkbox of Terms of Service is required. Make sure your carefully read the Terms of Service, and then tick the box to be able to proceed.
After completing all the required info, review your order detail one more time then click on Checkout button, after which you will be redirected to the invoice page for reviewing and making the payment. Depending on the payment method selected, further instructions will be displayed in the invoice details page for making the payment.

What's Next?
- After making payment and initiating the domain transfer process, the system will retrieve the email address for the administrative contact as shown in WHOIS, and we will send an email to that address containing a link that must be clicked in order to approve the transfer. If you cannot receive an email to this email address, you will need to update the email address in WHOIS via your current registrar and then reach out to us so we can resend the email.
- Next, the system will submit the transfer request to the central registry of the domain. This is the final step. If your current registrar allows, you may be able to approve the transfer request from your account on their site at this time. Assuming you do, the transfer will complete within an hour. If your registrar does not allow the user to perform outbound approval, or you elect not to approve the transfer, the transfer will not be complete for a period of 5-6 days. There is unfortunately nothing we can do to expedite the process any further and it is completely out of our hands until the registry releases the domain. This "waiting" period is to give your current registrar time to reject the transfer. If the transfer is rejected, you will be notified by our system. We, unfortunately, will not know the reason for rejection so you will need to follow up with your current registrar.


