


Setting up a Chatwoot live chat widget is easy with the Chatwoot integration addon. First, create a live chat inbox in your Chatwoot account by following the official guide in this link below:
https://www.chatwoot.com/hc/user-guide/articles/1677580558
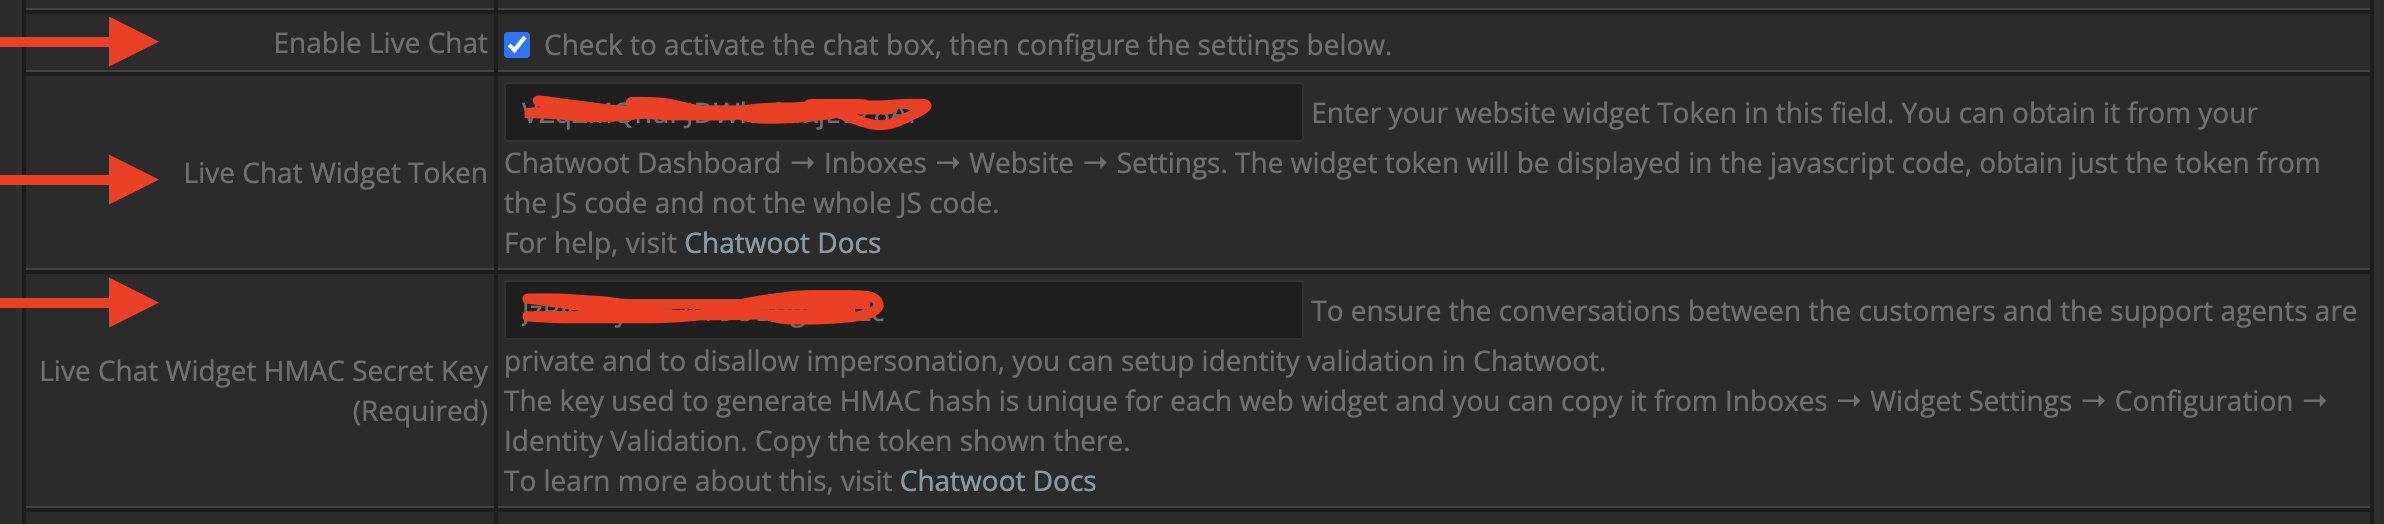
After creating the live chat channel, copy JUST the websiteToken from the JS code (without the quote marks). In addition to the token, copy the User Identity Validation token and tick to enable the Enforce User Identity Validation option as well.

In WHMCS in the addon settings, insert the above values in the respective fields in the add-on. Tick the option as well to enable the live chat widget, then click to save the changes:
You are now ready to display the Chatwoot live widget on your website.
Additional Settings:
The add-on allows you to customize various settings for the widget:
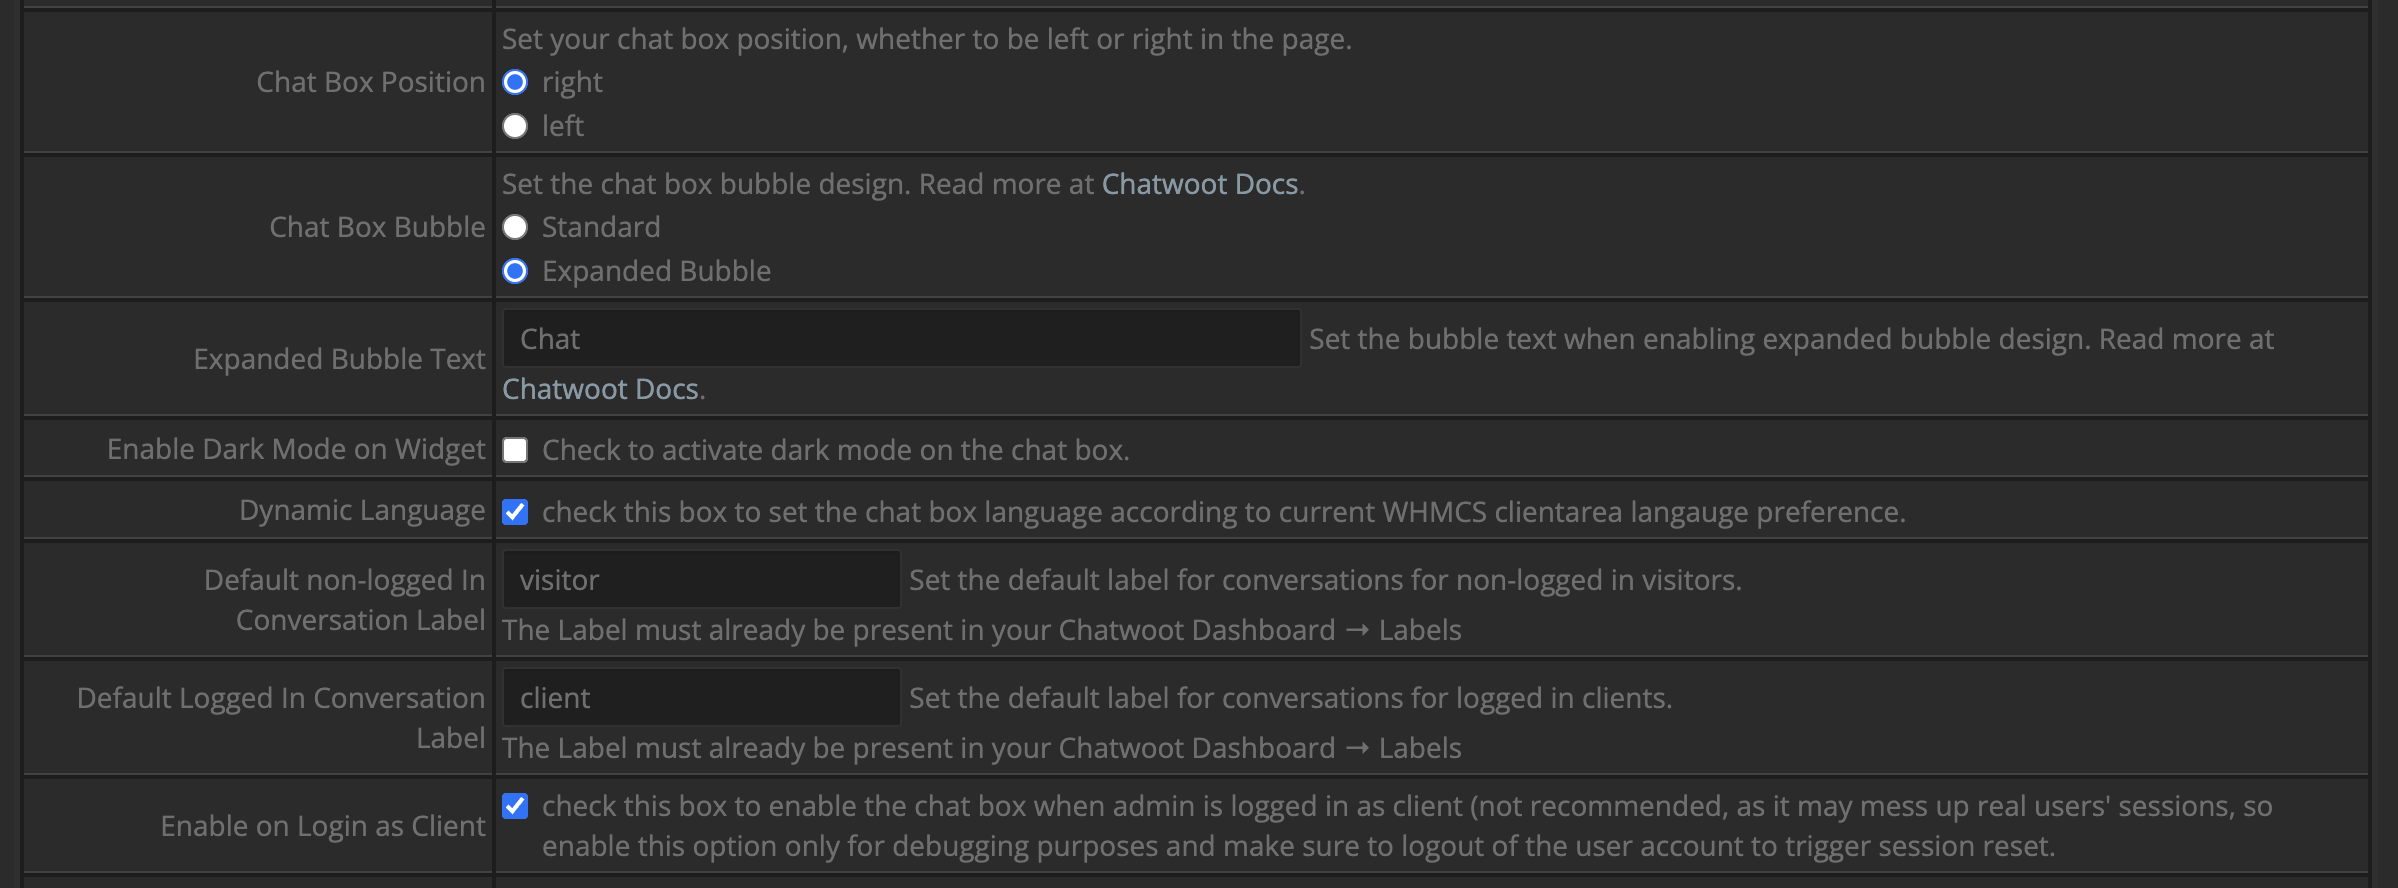
For the labels, make sure that any value you enter for the labels matches the name of the labels you created in your Chatwoot account. So first create the labels in Chatwoot by following the official guide in this link:
https://www.chatwoot.com/hc/user-guide/articles/1677496066
Custom Attributes:
The addon also allows you to pass useful information about your customer to Chatwoot utilizing the custom attributes feature. To make use of the custom attributes features, please follow the guide in the link below:
How to Pass Custom Attributes About Your Customer to Chatwoot

