This article explains how to add A records to your domain DNS using cPanel.
Note that all settings here assume the domain is using the default name servers. The name servers of your hosting plan can be found using this guide:
https://dash.wevrlabs.net/knowledgebase/4786/
If your domain is not using the default name servers (eg: is using Cloudflare), you will have to replicate whatever changes/additions you make in cPanel Zone Editor, again on the location where the domain DNS is hosted (eg: on Cloudflare DNS settings if the domain is using Cloudflare nameservers).
Add the A record in cPanel
A Record is a DNS record and is used to point a domain or subdomain to an IP address. You can add "A Record" using the cPanel"s Zone Editor option.
1. Log into your cPanel account. (for helo accessing cPanel, please visit this link: https://dash.wevrlabs.net/knowledgebase/2/How-to-access-cPanel.html )
2. In the "Domains" section, click on the "Zone Editor" Icon.
![]()
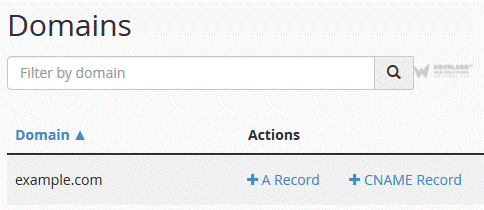
Under "Domains", you can see many options below the "Actions" text

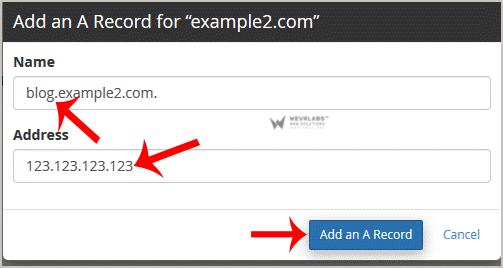
3. Click on "A Record" and a small window will pop open. Enter the required details in it.
Name: Enter the name you wish to add, for example, add "blog" and the cPanel will automatically add a domain name like blog.example.com.
Address: Enter the IP Address of the server.

Now click on the "Add an A Record" button.
If the record is added successfully, you will see a success message. The DNS propagation can take up to 72 hours.
Note: on average, it may take anywhere from 12 to 24 hours for the changes to take effect worldwide.


